


Streaming technology allows anyone to watch videos online without the need to download them. And, a streaming server is what makes it all possible, so that video feeds from streamers can reach their viewers in no time.
But, what are streaming servers? These servers are the ones that handle video data and make it available whenever viewers request it.
Keep in mind that when it comes to a live streaming server, availability is vital. As a streamer, you need to use a reliable server or you’ll end up providing a poor live stream experience to your audience.
So, does it mean that you need a dedicated server streaming? Or, do you even have to set up your own video streaming server? In this article, we’ll talk about these topics in detail. So, let’s get started!
What is Streaming Server?
A streaming server is a server that is used for handling video streaming, whether it’s live streaming or on-demand.
Video streaming servers can come in different forms: physical dedicated hardware, cloud services, or even a regular computer set up for streaming over the internet. Regardless of the form, these servers play the role of connecting you as the broadcaster and your viewers.
The server will make sure the video data flows smoothly, so the audience can watch any video content online without needing to download it first. And thanks to this, enjoying all sorts of online video content has become easier.
Streaming servers are what make it possible for you to watch Ninja crushing it in Fortnite live on Twitch, and enjoy those exclusive series on Netflix over the weekend.
Did you know that 91.8% of people watch online video content every single week? Also, more than 82% of internet traffic worldwide comes from online video. In short, streaming online has become a massive new trend.

But, what does it mean for you as a streamer?
Without an awesome live streaming server, it’s nearly impossible to captivate your audiences with an amazing streaming experience. Great content alone won’t cut it without the right streaming video server in place.
Let’s dive a bit deeper. A video streaming server is a part of the streaming process. It works alongside streaming protocols like RTMP (Real-Time Messaging Protocol), HLS (HTTP Live Streaming), and DASH (Dynamic Adaptive Streaming over HTTP).
These protocols often come with awesome features like adaptive bitrate streaming that adjusts the video quality based on viewers’ internet speed. So, if you have a proper streaming server that works well on good streaming protocols, ensuring a smooth viewing experience is a breeze.
But, who actually needs a video server?
Do You Need a Video Streaming Server?
Any content creators who want to make their content available for an audience online need a streaming server. To be more precise, you’ll need a video streaming server if you are a:
- Streamer — you need an awesome live streaming server to make your gameplay immersive and keep your viewers engaged
- YouTuber — upload your tutorials or ASMR videos worry-free. You can rely on YouTube’s video server to ensure your content is accessible without buffering
- vTuber — due to demanding high-quality graphics and real-time interaction, you’ll need a robust streaming video server to prevent latency issues
- Vlogger — don’t worry about how often you upload videos on your vlog channel when you have a reliable video server supporting you
- Musician — offering live concerts or on-demand streaming of albums becomes easier with a lag-free streaming experience backed by a robust video streaming server
- Sportscaster — you can deliver real-time content to sports fans worldwide from anywhere
- Business — get ready to boost sales and brand awareness through lag-free video content
The streaming server can either store the content or serve as the medium to deliver it in real-time, depending on your streaming needs.
Now, if you’re looking for a streaming server, you might be wondering, “Which type of server is the right fit for me?”
What Types of Streaming Servers to Choose?
To make your livestream awesome, it’s vital to choose a streaming server that aligns with your needs and target audience. Let’s explore some types of video streaming servers you can consider:
1. Live Streaming Platforms
You can make the most of video-sharing platforms or free live streaming platforms like Twitch, YouTube, DLive, and Trovo to get a reliable streaming server for your content.
As the name suggests, these platforms offer streaming services without any direct cost. This means you can use them to store your video content or live stream in front of your audience without having to pay for it. It’s a great way to get started without breaking the bank!
Why do you need to use streaming platforms as your streaming server?
- User-friendly interfaces make it easy to navigate and use the available features
- Their built-in audience engagement tools, like real-time chat, make interacting with your viewers a breeze
- They should be compatible with various devices, from desktop to mobile, ensuring wider accessibility
- You can save time leveraging existing communities for your streaming channel, instead of starting from scratch
- They have monetization options that allow you to generate revenue through subscriptions, donations, and more
- You can enjoy seamless social media integration, making cross-promotion on other platforms a breeze
2. Video Platforms
Just like live streaming platforms, many online video platforms offer free services for streaming without spending a dime. Restream is a great example, allowing you to not only live stream but also store certain videos.
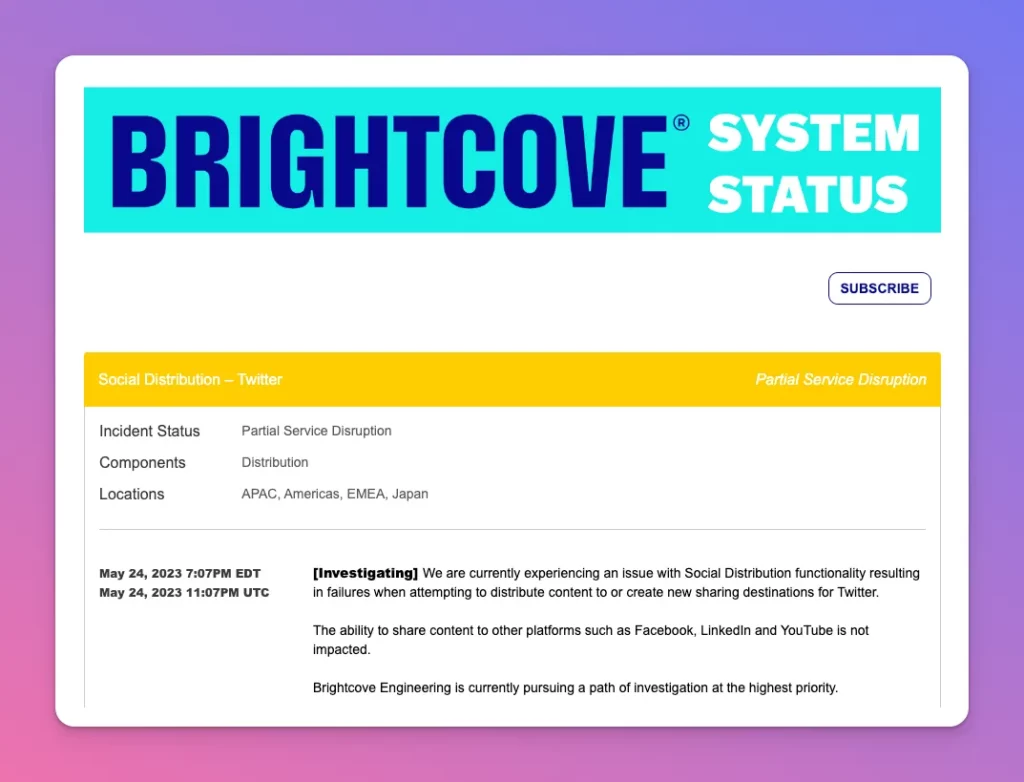
For more professional video quality in your streams or on-demand content, platforms like Livestream, Brightcove, or Kaltura are the way to go. They provide video streaming servers with amazing quality that ensures top-notch performance.

One of the best things about these video platforms is their managed services. They handle all the nitty-gritty configurations, so you can focus on creating great content without the hassle of technical details.
Why do you need to use video platforms as your streaming server?
- It offers professional-grade streaming which is great for professional content production.
- It has advanced features like customizable players, interactive elements, analytics, and multi-bitrate streaming options.
- It comes with monetization capabilities to generate revenue from paywalls, subscriptions, and ad integration.
- It supports branding to make you have full control over your personal branding as a streamer
- It guarantees reliable performance for the best content delivery with updated status of their running servers
- It supports hassle-free third-party integration to enhance streaming capabilities.
3. Content Delivery Network
A Content Delivery Network (CDN) is a network that has multiple servers spread across different locations worldwide. That way, it can deliver content faster by serving requests from the nearest server to the client.
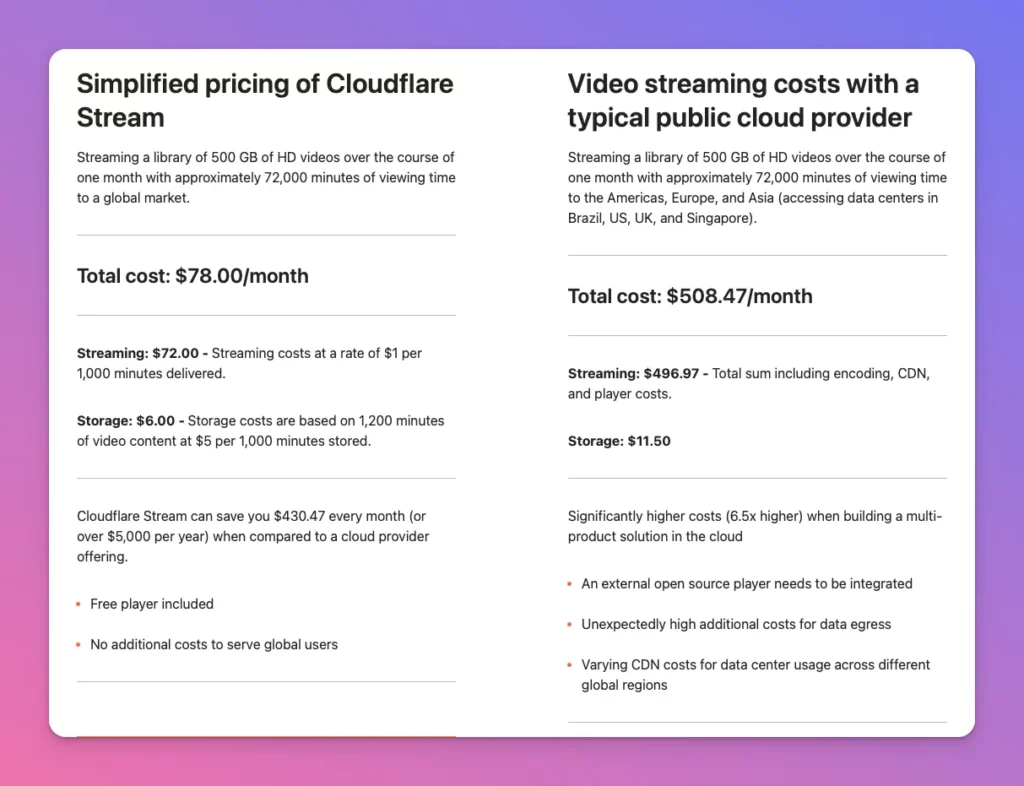
When it comes to CDN providers, there are some great options like Akamai and Cloudflare. These providers are well-known for their streaming servers, offering excellent performance through caching and efficient content distribution.
Why do you need to use CDN as your streaming server?
- It’s preferable if you want to reach a global audience, taking advantage of their network of servers around the world
- It’s reliable to handle high traffic without compromising streaming performance, making them perfect for growing audiences
- It guarantees a better latency that makes content delivery faster for an optimal viewing experience
- It comes with awesome security features like protection against DDoS attacks
4. Your Own Video Streaming Server
If you want to have your very own video streaming server, get ready for some hands-on work! You’ll need to set up the server using self-hosted solutions. For instance, you can use the Nginx web server with the RTMP protocol, and pair it with streaming software like OBS Studio.
That’s not easy but gives you complete control and flexibility. With your own streaming server, you can customize it the way you want and use any third-party integration to supercharge your server capability. What’s even great is it can be a more cost-effective option for your streaming needs.
Read : OBS Studio vs Streamlabs: A Comprehensive Comparison
Why do you need to build your own streaming server?
- You have the power to customize the infrastructure and workflow according to your needs
- It’s great because you can tailor everything to meet your specific requirements and preferences
- Building your own server can save you money compared to using a third-party platform
- You have full control over content distribution, which gives you better privacy compared to other services
- Even if you build your server, you can still integrate with a CDN to enhance its performance
How to Build Your Own Live Streaming Server
If you decide to go with a streaming platform or a content delivery network (CDN), you can simply sign up and enjoy their managed services. However, if you’re up for the challenge of building your own streaming server, get ready to roll up your sleeves.
Here are the steps to get you started on building your streaming server:
1. Plan Your Streaming
Before going into the technical details, the first step is figuring out what you need from your server. Are you planning to use it for live streaming or on-demand video streaming?
For on-demand content, consider the video quality you want to offer, 720p, 1080p or 4K. This quality choice affects the file size, which determines your storage space and bandwidth requirements.
If you’re planning an interactive live stream with features like live chat or reactions, ensure your server can handle the extra data stream without compromising video quality.
What’s more, anticipate how many people will watch your stream at the same time. This affects your bandwidth and the processing power needed to handle the traffic. If your computer isn’t powerful enough, you may struggle to provide decent video quality during the live stream.
Understanding your needs will help you decide on the other components necessary for building your video streaming server.
Read : All You Need to Know About Video Content Creator
2. Determine Your Hardware
Are you thinking about using your current computer as your live streaming server? No problem. But first, you need to do a quick check. Bear in mind that not all computers are up to the task of handling the demands of streaming.
You heard that right, streaming can be resource-intensive. So start it by checking your CPU specifications. Make sure it has the latest technology, having the multicore one will be awesome. On top of that, aim for at least 8GB of RAM. Plus, use an SSD with a minimum of 512 GB to store your video files.
Next, make sure you have a high-speed broadband connection using a wired internet cable. This offers better stability compared to Wi-Fi. Also, invest in a great cooling system for your streaming server to prevent overheating. Otherwise, it can negatively impact performance and overall stream quality.
Keep in mind that these specifications may need to be even higher if you plan to stream full HD or 4K videos.
If your computer doesn’t meet those requirements, try to build a new streaming server with great specifications.
Read More: Gaming Streaming Setup
3. Choose Your Web Server
Choosing the web server is just as important as choosing the hardware. Luckily, there are plenty of great options available. If you’re looking for a cost-effective solution, Nginx Web Server is recommended.
Nginx is an open-source software that can work great as a streaming server because of its high performance, stability, and low resource consumption. Also, Nginx is a multi-platform that it supports Windows, macOS, and Linux.
The great thing about Nginx is its compatibility with HLS (HTTP Live Streaming) and RTMP (Real-Time Messaging Protocol). It’s worth noting that platforms like Twitch receive live stream uploads in RTMP from streamers and then transcode them to HLS for broader audience reach.
4. Set Up Your Server
We will not go into the details of setting up your Nginx server here. But, don’t worry, you’ll find many online tutorials on blogs or YouTube to help you get started. For example, if you’re using Ubuntu as your system, you can check out this video:
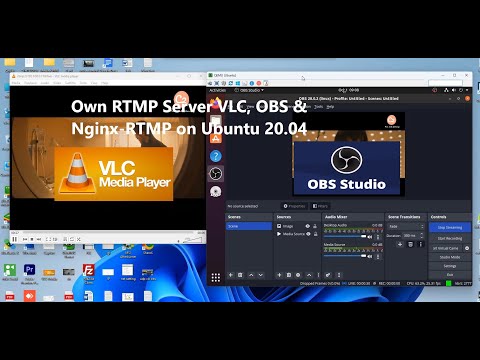
In short, here’s what you need to do: install the software, configure the IP address, port number, server block, and so on. And, remember to make sure that the RTMP module is installed, too.
5. Install OBS Studio
Once your web server is up and running, it is time to configure your streaming software.
OBS studio is one of the most popular and recommended ones. So, you can download and install it on your computer. What’s great about OBS Studio is it comes with Auto-Configuration Wizard that guides you through the setup process based on your specific preferences.
Next, head to Settings > Stream. There, you can enter your RTMP URL, IP address, and Stream Key. Click Apply and OK to save your settings. Then, you can start streaming and make adjustments if needed.
Again, it’s always a good idea to follow a comprehensive guide when setting up OBS Studio. Alternatively, if you prefer a more user-friendly interface, you can give Streamlabs OBS a try.
Read More: Streamlabs vs OBS Studio
5. Build Your CDN Network
As mentioned earlier, you have the option to go with established CDNs like Cloudflare from the start. However, it’s important to note that you can also create your own CDN when building your own streaming server.
Having a CDN in place helps minimize latency, resulting in a better viewing experience for your audience. That’s why it’s crucial to consider this aspect when constructing your video streaming server.
Here’s what you need to do:
- Choose Your CDN Provider — Akamai, Cloudflare, and KeyCDN are some of the great options when it comes to CDN providers. If unsure, think about their geographic coverage, cost, and specific features that align with your needs.
- Set Up Your CDN — Sign up for an account and set up your CDN. Generally, you’ll need to provide your origin server’s URL, meaning your streaming server, to the CDN. That way, they will pull content from your server to distribute to its network of servers.
- Configure Your Streaming Server — Set up your streaming server to work with the CDN. This often means updating your streaming URLs to point to your CDN’s URL.
- Test and Fine-Tune — Make sure the CDN is working correctly, then optimize your caching settings, and HTTPS configurations for optimal performance. If your CDN offers features like geo-blocking or hotlink protection, consider enabling them, too.
6. Set Up Your Media Player
You’re almost there. The final step in building your media streaming server is setting up your media player. It plays a vital role in decoding your stream data and displaying it on your screen for playback.
On top of that, the media player also handles the user interface, allowing viewers to interact with your stream. This feature is especially handy for on-demand content, as viewers can play, pause, and fast-forward as they please.
To set up your media player for your streaming server, you can simply download and install the media player on your device.
VLC is a popular choice for streaming, but HTML5 video players work great too. Whichever you prefer, ensure that your selected player is compatible with your viewers’ devices.
Read : Best Content Creator Tool 2023
Things to Consider When Using a Streaming Server
If you just started, choosing between building your own streaming server or using a dedicated server for streaming can be tough. Here are key factors to consider:
1. Technical Understanding
Setting up a server can be overwhelming if you’re new to streaming. Although there are helpful resources available, it can still be challenging without some technical knowledge.
The reason is you need to make sure that your stream runs smoothly every time you go live.
Adding to that, if you lack technical expertise, it’s easy to end up buying overkill specs, making it less cost-effective. So, if you’re unsure, opting for a service that provides a great streaming server can be the best choice, offering reliable results without the complexities.
2. Time and Effort
Even if you know how to set up and maintain your streaming server, do you really have the time and energy for it? Wouldn’t it be better to focus on coming up with awesome ideas and creating content for your audience?
With that in mind, might want to consider skipping the server setup hassle and go for an easier option. Let’s say sign up for a dedicated streaming platform like Restream, or try to use a CDN service like Cloudflare.
At the end of the day, it’s all about finding what works best for you and saves you some precious time and effort.
3. Cost
We understand that going with a dedicated server streaming service is convenient. But, it usually comes with a higher price tag compared to building your own setup.
If you decide to take this route, do research for the different pricing models offered by the services you’re interested in. They might all claim to be affordable, but make sure they actually fit your streaming needs.

Also, don’t fall into comparing prices only. Take a look at their advanced features, too. Think about how that platform can level up your streaming game and make you stand out.
4. Latency
In the world of streaming, latency remains a challenge. So you need to think about it when kickstarting your streaming journey.
Latency refers to the delay between capturing a frame and displaying it to viewers. Having low latency is important for real-time interactions. Without it, online gaming and interactive broadcasts wouldn’t be as enjoyable.
RTMP and WebRTC (Web Real-Time Communication) are two streaming protocols that focus on giving the lowest latency possible. These protocols are also popular among live streaming platforms like Twitch.
So, make sure your streaming server can go hand in hand with these protocols.
5. Scalability
You don’t want your live stream channel to hit a roadblock, right? That’s why it’s crucial to set up your streaming server in a way that can adapt to future changes right from the start.
Your server needs to be ready for potential growth. If your viewership skyrockets and your server can’t keep, your viewers will experience buffering. And, that is not a pleasing experience.
Remember that earlier in the guide, we recommended setting up a CDN? That step is all about distributing the load and making your stream accessible to a wider audience.
6. Security
When you’re streaming online, security is a top priority for both you as a streamer and your viewers.
As a streamer, you want to ensure your content is protected from unauthorized access. And for your viewers, it’s essential to safeguard their data and privacy. This applies whether you’re using your own server or streaming platforms.
To boost security on your streaming server, you can use firewalls and DDoS protection. Or else, if you choose a platform, look for one that offers stream encryption and digital rights management (DRM) features.
7. Advanced Features
Having advanced features for your stream is a bonus. Most setups and services offer great adaptive bitrate features. But, having DVR functionality to pause and rewind live streams can take your stream to the next level. That’s what Wowza Streaming Engine has to offer.
Read More: 4K Streaming Internet Speed
What’s more, online platforms like YouTube and Facebook support 360-degree video streaming. The viewer can control the viewing direction, creating an immersive experience. If you want this feature on your server, you’ll need software that can handle 360-degree video capture.
Final Thoughts on Streaming Video Server
A streaming server is a server to broadcasts your video content over the internet. With the server, you can go live on Twitch or provide on-demand content.
When it comes to streaming servers, you have two options: sign up for streaming platforms or build your video streaming server. Each has its own pros and cons to keep in mind.
We have covered how to build your streaming server and shared tips for using one. With that information, you’ll be ready to kickstart your streaming channel and stand out as an awesome streamer on any platform.
That’s all for now and happy streaming!


