


Twitch is more than just a live streaming platform. With a massive 2,440,967 concurrent viewers and an average of 1,673 hours spent as of 2024, you know it’s a strong community. And to make your mark as a top content creator, you need to know how to stream on Twitch well.
We’re here to help. Whether you’re a console gamer or a PC gaming streamer, we’ll walk you through the essential steps on how to start a stream on Twitch, from setting up your account to hitting the Go Live button.
We’ll also show you how to improve your stream quality, connect with your viewers, and even monetize your content. Ready to jump in and become one of the top streamers out there?
How To Stream On Twitch (with a New Account)
You have to make a Twitch account before you can start streaming on Twitch. Just follow these easy steps to become a streamer:
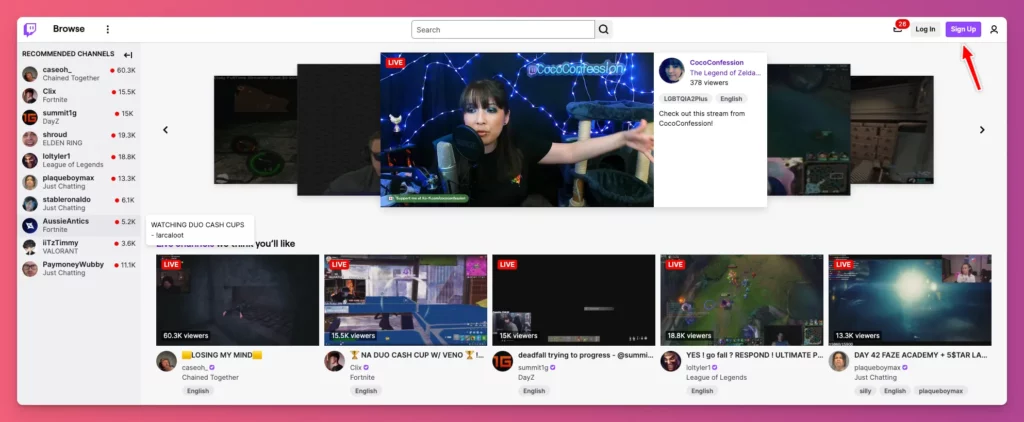
1. Go to the official Twitch website.
You need to visit the Twitch website and click on the Sign Up button on the top right side.

2. Enter Your Account Details
You’ll be asked to provide the following information:
- Username — Choose a unique username to represent you on Twitch
- Password — Create a secure password with at least 8 characters, uppercase letter, number, special character, and avoid using your username, ‘Twitch’, or repetitive characters
- Date of birth — This is necessary to meet Twitch’s age requirements
- Phone Number or Email — Fill in the information accurately for confirmation

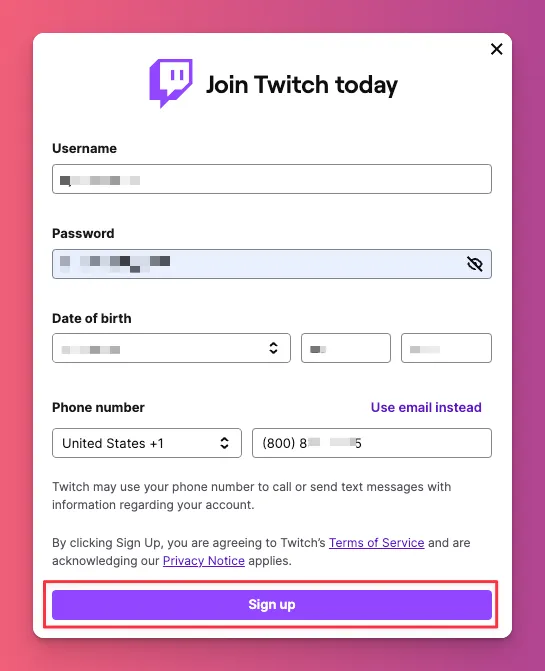
3. Signing Up
When you have confirmed the correct information, simply click Sign Up to proceed to the next step on how to start streaming on Twitch.
Bear in mind that some people can’t continue to the next step. If you have the same issue, try using your email instead. We tried this method and it worked.
4. Verify Your Email
When creating a new Twitch account with email, you’ll see a pop-up window to verify your email address.


Open your email inbox and find the verification code sent by Twitch. Then, enter the code in the Twitch verification pop-up. If the code is correct, you’ll have your Twitch account ready.
5. Setup 2FA (Two-factor Authentication)
How do I stream on Twitch after having the account ready? You still need to set up the 2FA. This step is not part of the main account creation process, but without it, you won’t be able to stream.

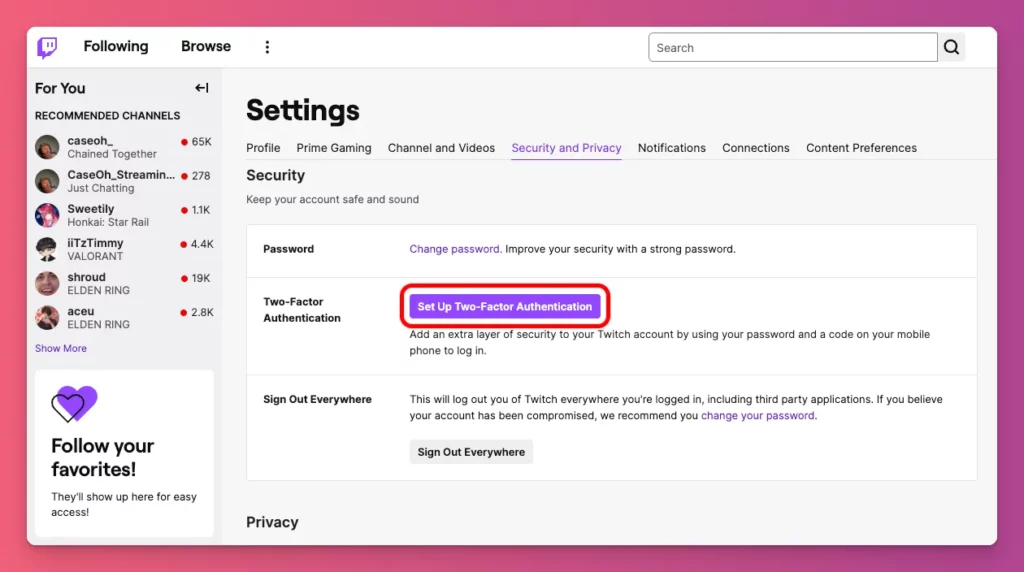
You need to follow these steps:
- Click the profile icon at the top right corner, then choose Settings.
- Go to Security and Privacy in the Settings page.
- Click Setup Two-factor Authentication in the Security section.
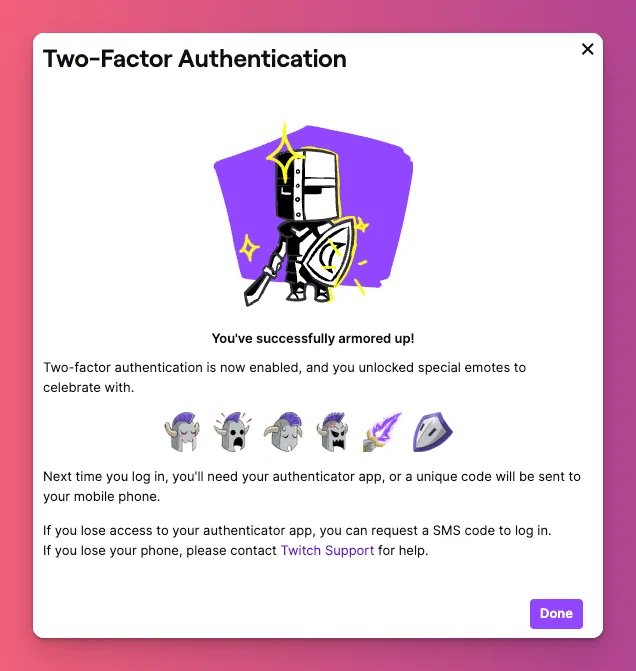
- On the Two-factor Authentication page, click Enable 2FA.
- Enter your mobile phone number and wait for the verification number.
- Use a working Authenticator app like Google Authenticator to scan.
- Enter the code from the Authenticator app to complete the 2FA setup.

How To Stream on Twitch on PC
After setting up your Twitch account, let’s learn how to start a stream on Twitch on a computer or PC:
1. Get Your Streaming Setup Ready
To start streaming on Twitch, you need to have all your streaming setup ready for your session. These include:
- Webcam — Choose a webcam that fits your budget and quality needs. 1080p is recommended for a clear image, but 720p is still good quality. You can use a facecam to add a personal touch to your streams. Or, you can use multi-camera live streaming if needed.
- Microphone — A good microphone is important for clear audio. USB mics are convenient and easy to set up, while XLR mics offer better sound quality for professional setups. Look for the best microphones for streaming with noise cancellation.
- Headphones — Headphones prevent audio feedback and unwanted noises on your stream. Gaming headsets or any comfy pair will work. Closed-back headphones are best for noise isolation and clear microphone.
- Lighting — Great lighting is a game-changer for your videos. If you don’t have enough natural light, get some ring lights, softboxes, or desk lamps to brighten things up. They’ll eliminate annoying shadows.
- Proper Internet Connection — Smooth streaming requires a solid and fast internet connection. Shoot for at least 5 Mbps download speed and 3 Mbps upload speed. Anything slower could mean major lag, dropped frames, and other annoying problems.
- Green Screen — This is optional. Even the highest paid Twitch streamers often skip it. But, if you want a custom background and an immersive stream, you need to get a green screen. It can be as simple as a green screen cloth or an attachable one like the Webaround BigShot 56.
Get those devices connected to your computer with the right cables. Position your webcam at eye level for a natural chat vibe, and keep your microphone 6-12 inches away from your mouth for clear audio. Test everything before moving on to the software setup.
Read Also:
2. Choose Your Streaming Software
Now that you have all the equipments you need, choose and set up the streaming software to control your stream. Some of them are:
- OBS Studio — ideal for streamers with its free, customizable, and feature-rich software.
- Streamlabs OBS — offers a user-friendly interface and additional features.
- XSplit Broadcaster — a paid software that provides a professional and user-friendly experience.
- vMix — a high-quality software designed for live video production, offering advanced features.
We’ll use OBS Studio in this guide because it’s popular, affordable, and has many features. Let’s get started:

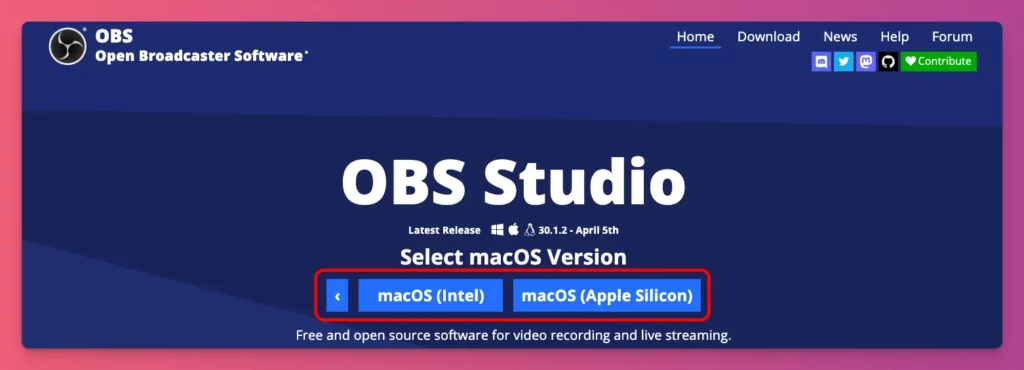
- Download OBS Studio from the official website for your operating system (Windows, macOS, or Linux).
- To install OBS Studio, follow the instructions on the screen. Mac users can simply drag OBS Studio to the Applications folder.
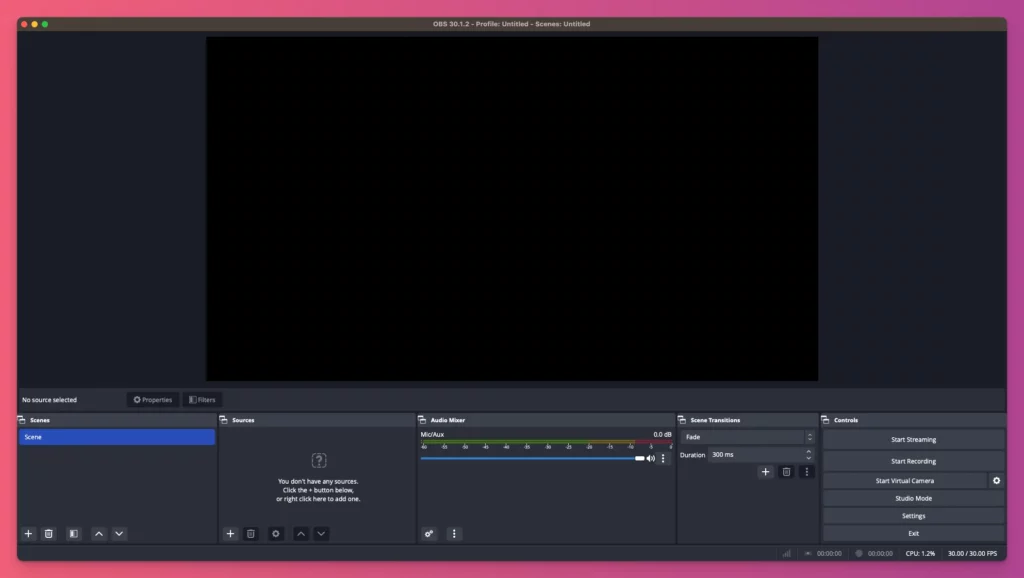
- After installing OBS Studio, open the app. You’ll begin with a blank page to create your stream’s layout.

3. Get Your Primary Stream Key
Depending on your streaming software, you will need to set it up and connect it to your Twitch account.
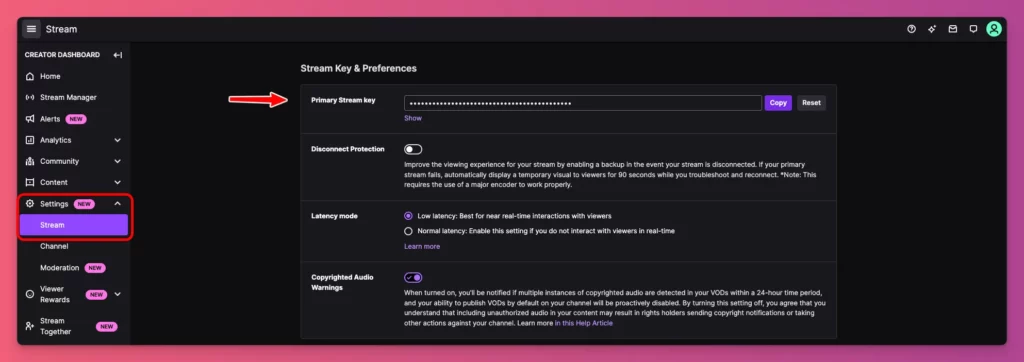
One of the first steps to start streaming on Twitch using a PC and OBS Studio is getting the primary stream key. Here are the steps:
- Log in to your Twitch account.
- Click on your profile icon in the top right corner and choose Creator Dashboard.
- In the Creator Dashboard, click on Settings and choose Stream.
- On the Stream”settings page, you’ll find your Primary Stream Key.
- Click the Show button to see your stream key or click Copy to use it in OBS Studio settings.

4. Connect Your Twitch Account
Once you have the stream key, you need to connect your Twitch account to the OBS Studio app. Here’s how to stream on Twitch PC:
- Click on Settings from the menu on the bottom right or select Preferences from the app options.
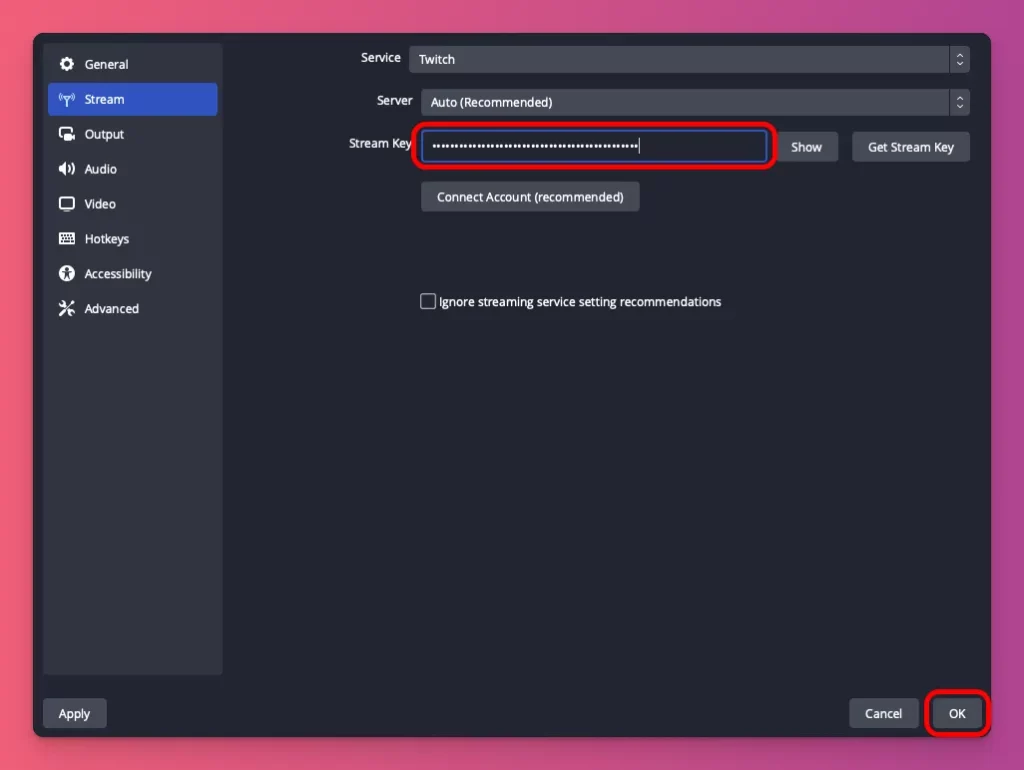
- In the settings window, choose the Stream tab on the left sidebar.
- Under Service, make sure Twitch is selected from the dropdown menu.
- You can connect your Twitch account or use the Primary Stream Key. (This guide uses the primary stream key).
- Paste your Primary Streaming Key and click OK

5. Set Up Your Video and Audio Sources
Once you’ve connected OBS with Twitch, you’re good to go. Just click on “Start Streaming” from the menu at the bottom right to begin your stream.


But, if you don’t pay attention to your sources, you might end up with a blank screen with no sound like this:

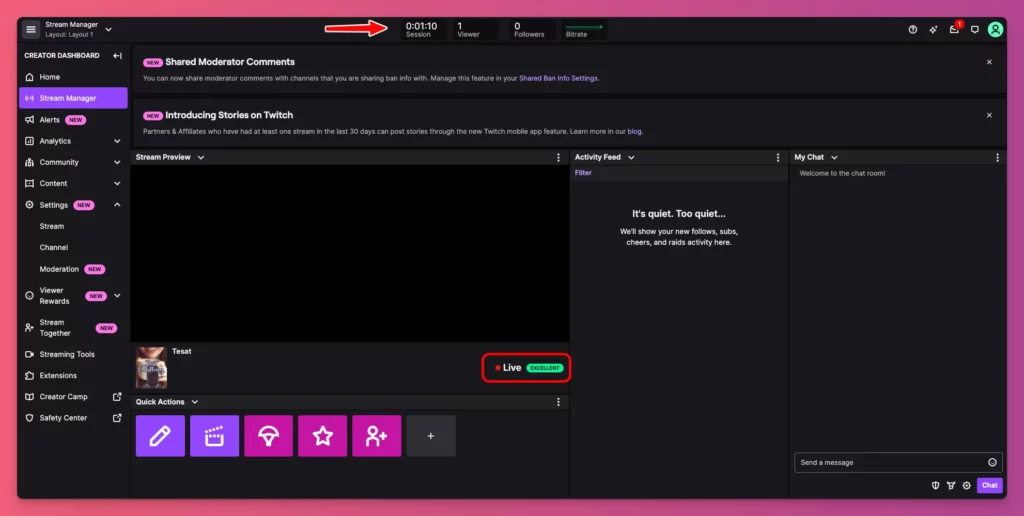
“So, how can I stream on Twitch with the correct settings?” Set up your video and audio sources first. This is one of the important steps on how to stream on Twitch.
Video Sources
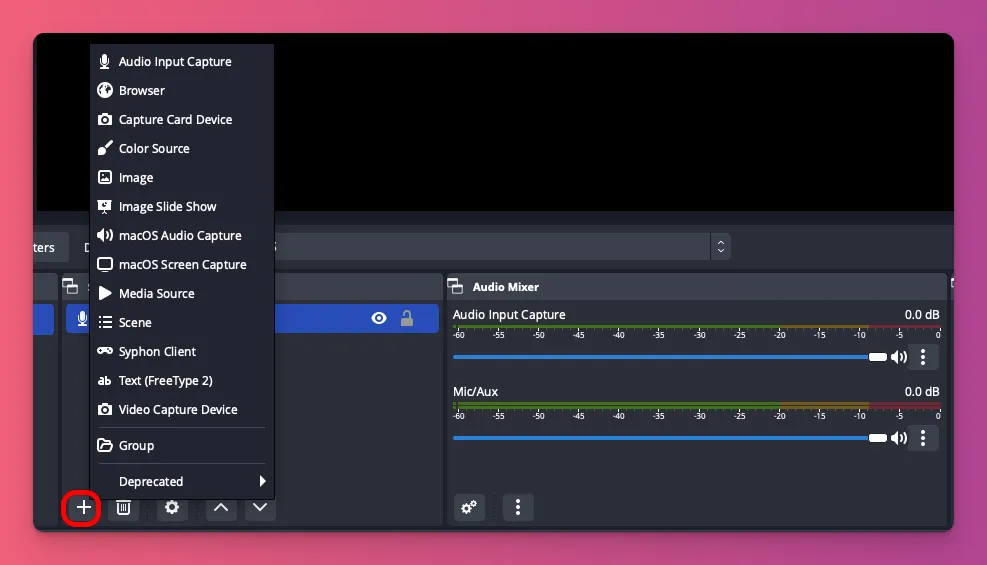
- Click the “+” button under Sources in OBS Studio.
- Choose your video source based on what you want to show.
- Video Capture Device — Use a webcam to show yourself on camera.
- Game Capture — Stream gameplay from a video game on your computer.
- Image — Display a static image like a logo or overlay.
- Media Source — Play a video file like an intro or outro.
- Capture Card Device — Capture gameplay from external devices like consoles or cameras.
- Browser — Embed a webpage into your stream.
- Image Slideshow — Create a rotating display of images.
- Once added, you can configure your video output later.

Audio Sources
- To add your audio sources in OBS Studio, simply click the “+” button on the Sources section.
- Choose Audio Input Capture if you want to use your microphone
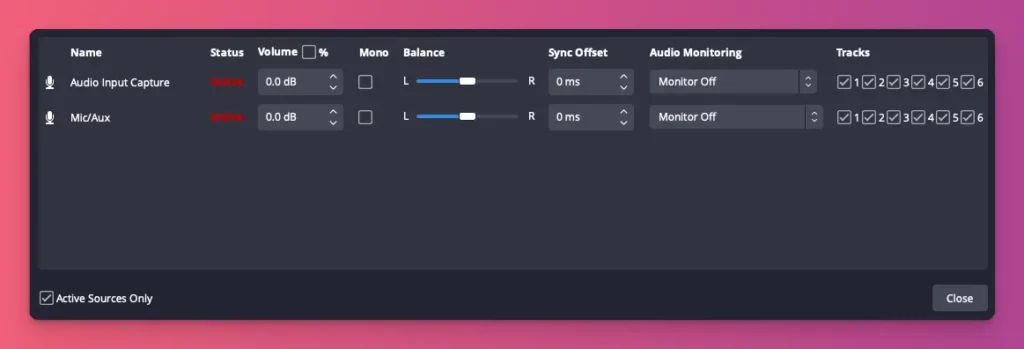
- Make sure to adjust the volume levels of each audio source using the sliders in the Audio Mixer.

6. Configure Your Stream Settings
Now that you have your sources ready, let’s explore the settings to make your stream look and sound great.
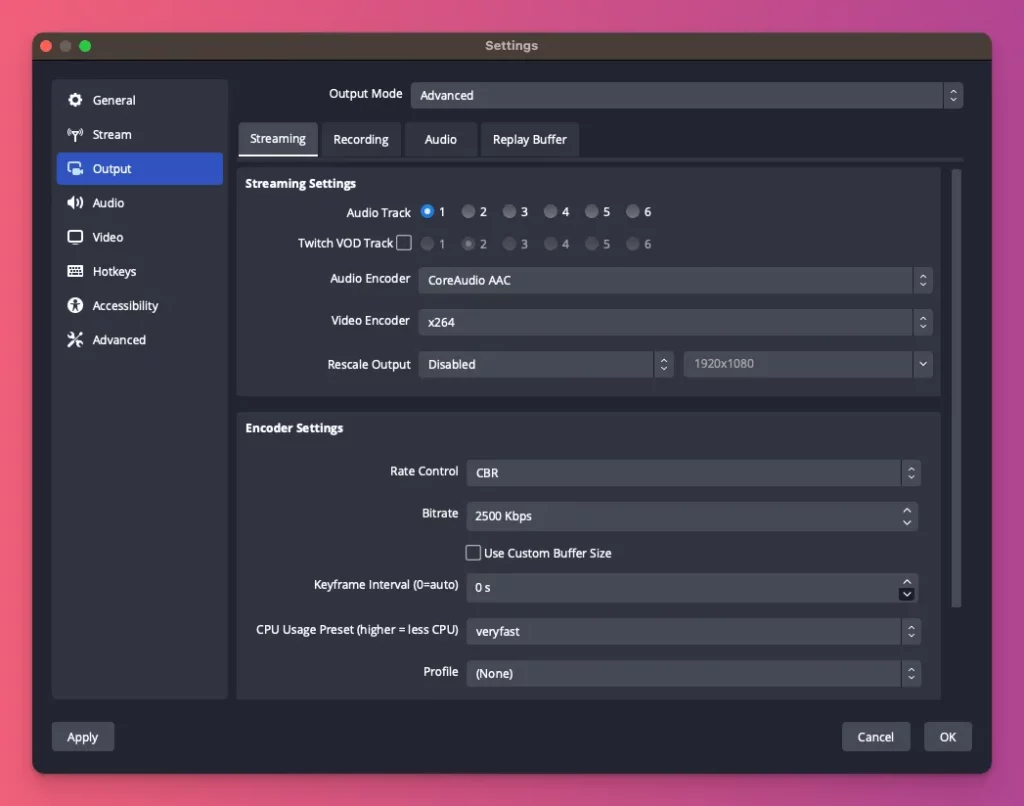
Configure Output
In your settings, go to the Output tab and switch to Advanced mode. This lets you access important controls to make your stream better. But if you like, you can use the Simple Mode for basic settings.
Here are some important settings to consider on how to start a stream on Twitch:
- Encoder — For smoother streaming, use a hardware encoder (NVENC or AMF) if you have a powerful graphics card, or the software encoder (x264) if not.
- Rate Control — CBR (Constant Bitrate) is recommended for a stable stream, while VBR (Variable Bitrate) might offer better quality but can cause buffering issues for some viewers.
- Bitrate — Choose the appropriate bitrate range based on your desired resolution and frame rate:
1080p 60fps: 4500 – 6000 kbps
720p 60fps: 3000 – 4500 kbps
720p 30fps: 1500 – 3000 kbps - Keyframe Interval — Set the keyframe interval to 2 seconds to prevent interruptions or buffering issues.

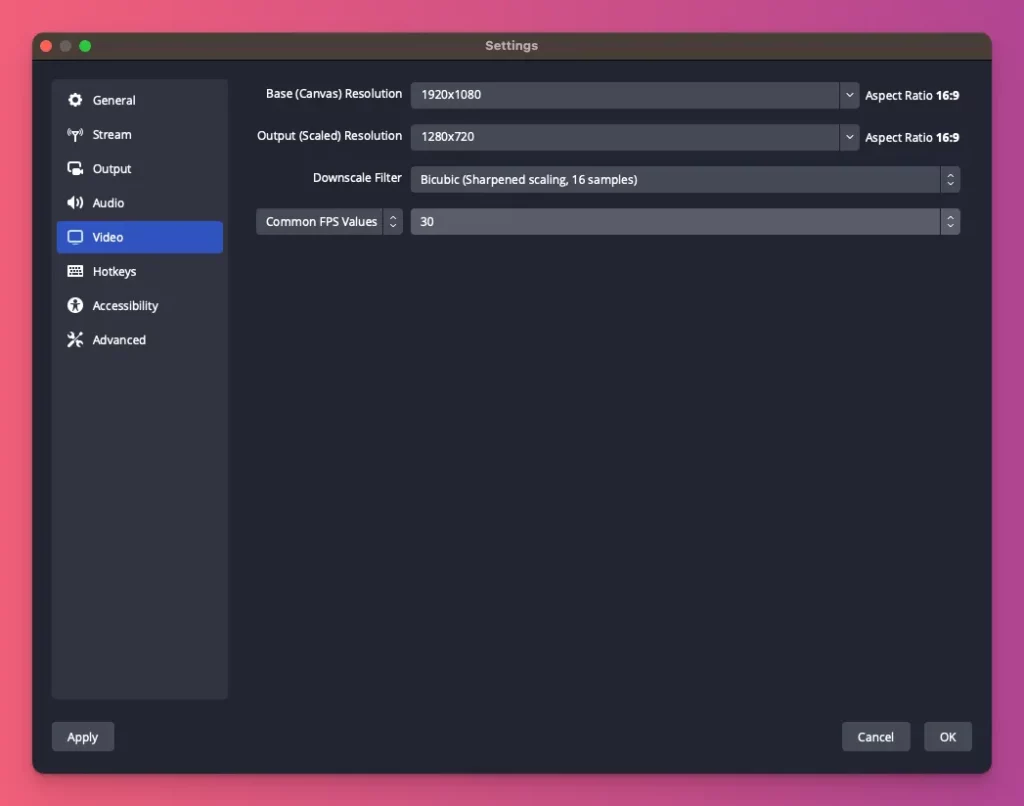
Set the Resolution
To ensure your stream looks good on all screens, follow these steps:
- Set the Base (Canvas) Resolution in OBS to match your monitor’s resolution.
- Choose the Output (Scaled) Resolution, which determines the resolution your viewers will see. Most streamers use 1080p, but you can also opt for 720p if you have a slower internet connection.
Create Your Stream’s Scenes
Scenes are like different layouts or “pages” for your stream. You can have one for gameplay and another for chatting. It’s so simple to add ones:
- Click the “+” button to create new scenes.
- Give a unique name for each scene for easy switching.
- Add and arrange your video and audio sources within each scene.
Once you are done with all the proper configuration, you can try clicking Start Streaming again to broadcast live in front of your audience.
Read Also: Best Games to Stream on Twitch
How to Start Streaming on Twitch from PS5
Many streamers use a computer to stream on Twitch. But if you’re a gamer and want to connect your PS5 to Twitch, here’s how you can do it:
- On your Play Station 5 dashboard, go to Settings > Users and Accounts.
- In the Users and Accounts menu, choose Link with Other Services and choose Twitch.
- On the Link with Twitch page, click Link Account.
- You will be directed to Twitch to scan the code displayed on your PS5 using the Twitch mobile app on your phone and activate your device.
- Once activated, authorize Twitch on your PS5 from the Twitch mobile app.
- After linking with Twitch, go to the dashboard and select the game you want to play.
- Press the Create button on your PS5 to access additional menu options on your screen.
- Choose Broadcast and add a title to your Twitch stream session.
- You can either tap Go Live or adjust the settings in the Broadcast Options before starting your stream.
Tips for How to Start a Stream on Twitch
Now that you know how to stream on Twitch, let’s learn some tips to start your stream like a pro:
1. Always Connect with Your Twitch Audience
Ninja, Pokimane, Tfue, you name it. They are all top streamers on Twitch because they are fun and communicate well with their audience while streaming.
Yes, connecting with your viewers is key to having a great Twitch stream. It’s not just about the content itself. It’s about building a community and showing your viewers that they matter.
It can be as simple as replying to comments, questions, and emojis. Or, simply call your viewers’ names, or listen to their opinions.
2. Make Your Stream Visually Appealing
Making your stream look good is harder than it seems. It takes a lot of effort. But it’s worth it if you want more viewers and subscribers.
Imagine your viewers watch your livestream. They see a nice webcam frame, cool animated notifications for new followers and subscribers, and overlays showing your donation goals. That will make them stay interested during your session.
That’s why you should learn to make nice designs. It’s good idea to use tools like Canva or Placeit as they have many templates to use right away.
3. Set a Regular Streaming Schedule
The Schedule tab on Twitch is there for a reason. And setting a regular streaming schedule is often overlooked but really helpful when it comes to how to stream on Twitch effectively.
If your favorite TV show came on at different times every day, you might stop watching, right? It’s the same with Twitch. Your viewers want to know when to catch your streams to become your followers.
You can start with picking days and times that suit you. But think about when your viewers are available. Hootsuite says the best time to stream on Twitch is 11 AM to 2 PM PST. But again, check if it matches your audience’s schedule.
4. Promote Your Twitch Channel
Do you think your Twitch channel will get bigger without promoting it? Well, that’s not how it works.
You still need to reach more people and get new viewers by using other social media platforms like X, Instagram, TikTok, and others. Not just to share your streaming schedule, but also to ask for ideas on what to stream about if your niche is Commentary or Just Chatting.
You can also join Reddit or Discord forums. But remember not to spam the forums with your Twitch channel promotion. Each forum has its own rules.
5. Collaborate with Fellow Streamers
Do you still think other streamers are rivals? That’s a bit outdated. Instead, see them as potential friends. xQc and Pokimane did just that. They streamed together on Twitch to chat about specific subjects. It not only helped them connect with more people but also boosted their Twitch channels.
You can do this too. Find streamers on the same niche as you and ask them to collaborate. You can play games, talk on a show, or do a challenge together.
Remember to support each other’s channels by promoting them. Give shoutouts, share social media links, and tell your viewers to check out your collaborator’s content.
6. Use Twitch Extensions
Twitch extensions are awesome tools that make your stream more exciting. They come in various forms, from polls and leaderboards to mini-games and loyalty programs.
You can use Sound Alerts. It lets viewers add sound effects to your stream, making it fun and exciting. This involves everyone and improves your stream. Another feature is Crowd Control. Viewers can vote on in-game events, making the stream unpredictable.
You can try different extensions to find the ones that your audience likes and make them feel more connected to your stream.
7. Monetize Your Content Well
Not everyone streams on Twitch for fun. Some want to turn their passion into a career. Streamers like Ninja and xQc have shown it’s possible to earn a good income. But how do they do it?
- Subscriptions. You can offer perks to subscribers with different membership levels and benefits. It’s like buying you a monthly coffee. You can host special events for subscribers, like Q&A sessions.
- Donations. It’s like a virtual tip jar for your stream. Set up a donation link through PayPal or Gank and let viewers know they can contribute if they like your content.
- Bits. They are Twitch’s money. Your viewers can use them to cheer for you in chat, and you get some of the money. You can make special cheer pictures that people can get by cheering with Bits.
- Ads. When you become an Affiliate or Partner on Twitch, you can show ads while you stream. But don’t show too many ads and bother your viewers.
- Merchandise. You can make t-shirts, hoodies, mugs, and more with your logo or unique quotes. You can sell them on platforms like Gank or on your own site.
8. Be Patient
Building a successful Twitch channel doesn’t happen overnight. It takes time and dedication. It’s like running a marathon, not a sprint. You gradually level up, refining your skills and gaining experience as you go.
Streamers such as Pokimane and Ninja worked hard for years to grow their fan base:
- Pokimane started streaming in 2013 and now has over 9.3 million followers.
- Ninja started streaming in 2011, became really famous in 2018, and now has over 19 million followers.
There’s no secret to how to start streaming on Twitch and become popular. Some people get followers fast, while others grow slowly.
Instead of focusing on the end goal, set smaller milestones. Celebrate reaching 100, then 500, then 1,000 followers. Each milestone shows your hard work and leads to more success.
How to Start a Stream on Twitch: A Wrap-Up
Learning how to stream on Twitch can be tough at first, but it gets easier as you go. This article has shown you how to do it step by step.
Remember that Twitch is a great streaming platform where you can broadcast whatever you’re passionate about. You just need to focus on creating awesome content for your viewers. You can stream on PC, PlayStation, Xbox, or even mobile.
You’ve learned how to create a Twitch channel and how to set up your streaming software and make your stream look great. Ready to hit that “Go Live” button?
FAQs
Are there any rules or guidelines I should follow while streaming on Twitch?
Yes, Twitch has a set of community guidelines that all streamers must follow. These guidelines cover topics like nudity and sexual content, hate speech, harassment, and copyright infringement. Familiarize yourself with these guidelines to ensure your streams comply with Twitch’s rules.
Can I use copyrighted music in my Twitch streams?
Using copyrighted music in your Twitch streams can potentially result in your content being muted or removed. Twitch has partnerships with certain music providers that allow you to use their music library without copyright issues. You can also use royalty-free music or get licenses to use copyrighted music legally.
How can I increase discoverability for my Twitch streams?
To boost your Twitch stream’s discoverability, optimize titles, descriptions, and tags with relevant keywords. Promote streams on social media and interact with potential viewers. Collaborate with fellow streamers to expand your audience. Deliver consistent, high-quality content to attract and retain viewers. Use platforms like YouTube to share stream clips, widening your reach.
How can I make my Twitch stream more professional-looking?
You can make your Twitch stream more professional-looking by investing in good quality audio and video equipment, setting up a visually appealing overlay or layout, creating custom graphics and alerts, and using scene transitions to enhance the viewing experience.


