


How to make ASMR videos? For the pros, it’s simple. But for new creators, it’s easy to mess up. Many end up with rushed, fake-sounding clips that viewers ditch in seconds.
They test their sounds while editing only to find problems too late. Or get stuck on microphone prices instead of learning to set audio levels. You don’t want to make those mistakes, right?
Here’s a simple 9-step guide to help you get started. The pros use this process to avoid those errors. Follow it, and you’ll make better videos. Let’s get started.
How to Make ASMR Videos like a Pro
Here’s how to make ASMR videos, step by step:
1. Choose One ASMR Trigger To Focus On
A trigger is the specific sound or visual action that gets your viewer to feel that ASMR tingling, relaxation, or calm they’re after. That’s the main focus of your whole video.
So, decide what you want to make as your ASMR content first. Which ASMR trigger you want to focus on?
Keep in mind that, different people find different triggers more satisfying. That means different audience for your content.
If you are unsure what triggers to do, research on “popular ASMR triggers” to find one that you are comfortable with doing and can achieve well.
Some simple, popular ASMR triggers are whispering, tapping, scratching, and eating. But in general, these are some of the types of triggers that can be your idea:
- Sound — Whisper softly into your mic, tap your nails on glass or wood, scratch a textured surface, or crinkle some paper. Gibi ASMR, with 5.19 million subscribers built huge audiences on these pure sound triggers.
- Visual — Watch someone arrange objects, fold items slowly, or write neatly. The visual rhythm creates the calm. ASMR Zeitgeist specializes in these clean, minimalist visual setups.
- Roleplay — Perform personal attention scenarios, like giving a haircut, applying makeup, or a head massage. You’re acting for an imaginary person.
- Eating Sounds — Capture the sounds of chewing, sipping, or soft eating. The intimacy matters most.
- Nature Sounds — Use rain, flowing water, or rustling leaves—these work with or without video. The ASMR Outdoorsman blends these nature sounds with binaural recording for immersive experiences.
- Binaural Audio — Create directional sound that simulates someone whispering or moving around the listener’s head. This is made for headphones.
- Tactile/Hands-On — Show repetitive hand movements like massaging, brushing, or applying lotions.
- Object Manipulation — Handle fidget toys, stress balls, or kinetic sand. The sounds and visual movement combine for the effect.
2. Find Your Recording Window
You need to find the time when your space is genuinely quiet. This is how most content creators skip making ASMR videos.
Your room has an acoustic schedule. HVAC systems cycle every 15–30 minutes, traffic peaks during commute times, and neighbors are loudest during daytime hours.
Test before committing. Record 2-minute clips in your main room at different times: midday, early evening, late night, early morning.
Late evening (9 PM–midnight) and early morning (6–8 AM) typically work best because road noise drops, HVAC systems run less frequently, and people are asleep.
But your specific location matters. If you live near a highway, those windows might shift.
And once you identify your optimal window—the quietest, most consistent time—schedule all recordings there.
3. Get Your Space Quiet
Your recording room has acoustic problems you just can’t hear until you listen back through a mic. So, first, get rid of active noise. Shut all the doors. Turn off your AC or heating. Silence your phone.
Listen to the raw room. Record 30 seconds of silence with your phone mic. Play it back with headphones.
Does the room echo? You need solution then. The budget approach? Use blankets and hanging fabric in your main room instead of a closet.
Hanging fabric absorbs sound well, but recording in a closet has acoustic issues from parallel walls and corners. This often leads to bass buildup and flutter echoes.
You don’t want your ASMR content to put people to sleep with random sounds, right?
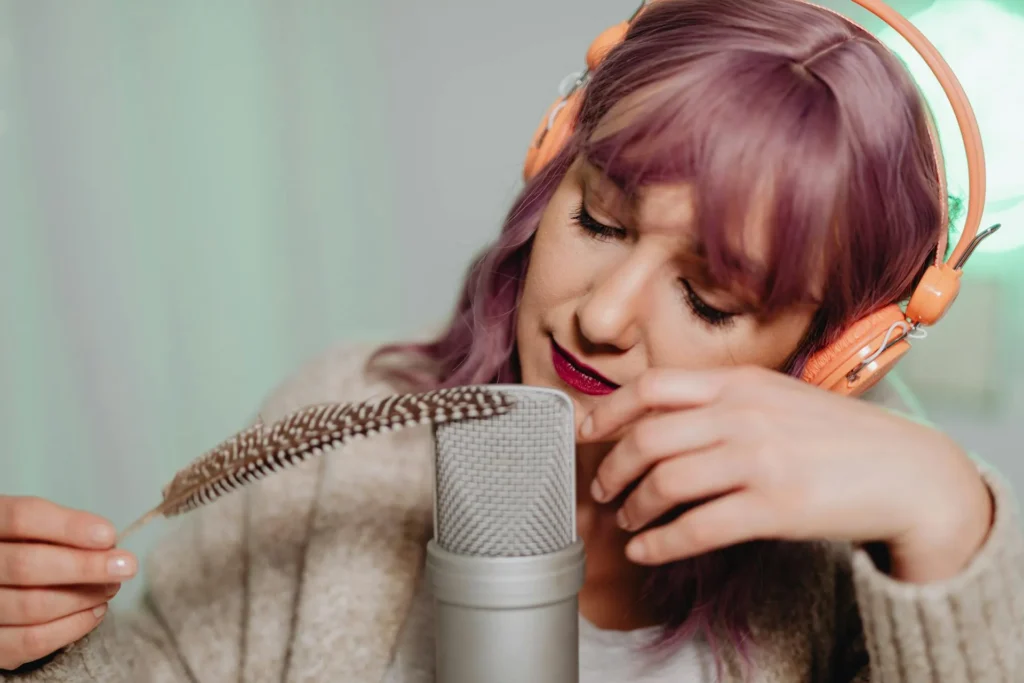
4. Position Your Mic for Your Trigger
Different triggers need different distances. There’s no universal mic placement—it’s trigger-specific.
For whispering, get 2 to 6 inches from your mouth, angled a bit to the side. Pointing the mic straight at your mouth picks up those harsh ‘P’ and ‘B’ sounds. Angling it away cuts that down.
- For tapping, place the mic 4 to 8 inches away at a 45-degree angle. You’re trying to capture the object’s full resonance, not just the tap itself. The angle is key for getting that depth.
- For eating sounds, you have to be careful. Test distances from 4 to 12 inches with different angles to find a spot that picks up the good texture without the unpleasant wet mouth sounds.
- For personal attention roleplay, it depends on the action. If you’re pretending to brush someone’s hair, put the mic where their ear would be—about 6 inches from your hands. For a face massage, just move the mic to follow your hands.
Related: Types of Microphone for Content Creators
5. Set Your Levels Before Recording
This is important. Most ASMR recordings fail at this step, and creators don’t realize it until editing.
Set your input gain based on your target peak levels rather than a percentage. A good starting point is to perform a test recording and adjust so your peaks land between -12 dB and -6 dB.
Wear headphones and do a 1-minute test recording. Speak or perform your trigger at normal volume. Watch your audio meter. –12dB and –6dB are great.
Clipping happens when the sound goes over 0dB, making the digital distortion sound harsh and robotic. You can’t fix analogue clipping in editing.
But with 32-bit float recordings, you can fix digital clipping by lowering the gain. For 16-bit or 24-bit, avoid clipping during recording.
If peaks go over –6dB, turn down gain. If below –18dB, bump it up. Go for a clear signal with room for volume spikes.
6. Do a Full Performance Test
Your viewers can sense your authenticity and how confident you feel. They can tell if you’re stressed by how you sound—like pitch changes, micro-tremors, and irregular speech rhythm.
So, just record yourself doing your trigger for a full 10 minutes without stopping. Don’t edit anything. Perform as if you’re live, like those top ASMR artists.
Watch the playback right away. Ignore the audio quality or camera angle yet. Just ask yourself: Do I look calm? Is my breathing deep or shallow? Does my voice sound rushed or strained?
If you hear tension in your own recording, pause. Don’t power through it. Choose a different trigger, change your setup, or come back when you’re relaxed. Then, record another 10-minute take.

Your comfort level is part of your technical setup. It’s not separate from audio quality.
When you watch the playback and think “I’d actually watch this,” you’re ready to move forward. If you cringe, adjust something before you waste a full recording session.
Remember, you want great ASMR content that will make people relaxed.
7. Record Your Video (Multiple Takes)
Now, record three to five complete takes of your trigger. Don’t try for a perfect take, just try to be authentic.
For microphone warmup: if you’re using a tube mic, let it warm up for 10 to 15 minutes before you start. Standard condenser and dynamic mics need very little settling time.
Right after your recording session, review your work. Did the audio stay clean the whole time? Did your performance feel real or forced? Was there a moment you rushed?
Keep your two best takes. You might edit one, or you might keep both and decide later. Having options is always better than betting everything on a single take.
8. Monitor Your Audio Throughout
Never record without your headphones on. You have to hear exactly what the microphone is picking up, not what you think is happening.
Wear headphones for the entire recording. Listen for hum, plosives, or sibilance (harsh S sounds). If you hear any of these mid-take, stop immediately.
Don’t plan to fix it later. Move your mic slightly. Change your angle. Adjust your distance. Re-record that section. This saves hours of frustration during editing.
Plosives happen when you speak directly into the mic. Turn it 45 degrees to the side. For sibilance, angle the mic so it’s not directly in front of your mouth.
If you hear electrical hum, it’s usually coming from your recording space or equipment. Unplug devices near your mic. Move away from outlets or electronics. Then test again.
9. Edit for Clarity (Not Perfection)
Import your best take into your editing software. Your first job is to sync the audio and video well.
ASMR viewers expect trigger sounds to match what they see. Even a slight delay, like a tap arriving a frame late, ruins it. Watch the start frame-by-frame and sync the audio perfectly.
Remove background hum and hiss, but don’t over-clean. Aggressive noise reduction removes the subtle textures that make ASMR work.
Keep it light, like three to five percent noise reduction. And never go above 8 percent. You want to remove annoying constant hum, not destroy the raw authenticity of your trigger sound.
Trim the beginning and end. Remove dead space before your trigger starts and after it ends. Keep the video tight. Add subtle fade-ins and fade-outs. These smooth the entry and exit without drawing attention. That’s all you need to do.
The moment you start adding prominent effects, transitions, or background music, you’re working against what ASMR is.
Related: Why do People Like ASMR
Tips for Creating High-Quality ASMR Videos
You know how to make an ASMR video now, but don’t forget these tips to make it really awesome:
1. Your Comfort Level Is Part of Your Technical Setup
Your physical comfort is a key part of your technical setup. If you’re hungry, tense, or cold, your breathing gets shallow and uneven.
Shallow breathing makes plosives worse, adds tension to your voice, and makes your whisper sound strained. Make sure you’re fed, rested, and warm enough to relax naturally when you record.
2. Test Before You Commit
Spending 45 minutes on a recording only to find problems while editing wastes your energy and motivation. A simple 10-minute test run can catch those issues before they ruin your work.
Check your mic placement, your levels, and your room’s sound in short bursts. Find problems early, fix them right away, and you’ll feel confident when you start your real recording.
3. Gain Staging Matters More Than Gear Cost
A fifty-dollar microphone set up with the right levels will always sound better than a five-hundred-dollar microphone recorded at the wrong volume.
It’s easy to blame your equipment, but the real problem is usually the gain staging. Master your levels first. Everything else comes later.
4. Your Room Is Your First Investment
Stop looking at new microphones. The room you’re in right now is your biggest opportunity.
Hard surfaces echo. Soft surfaces absorb. Test this in your space. You’ll be shocked how dramatically room treatment improves audio quality, even with basic equipment. Treat your room before upgrading gear.
Hard surfaces create echo. Soft surfaces soak up sound. Test this yourself. You’ll be amazed how much room treatment improves audio quality, even with basic equipment.
5. Slow Is Better Than Perfect
Your audience isn’t looking for a rushed, flawless performance. They want something intentional, deliberate, and calm.
If you have to choose between a slick delivery and a genuinely slow, authentic one, pick being genuine.
6. Trigger Authenticity Beats Trend-Following
Don’t chase trending triggers. If you force yourself to do popular triggers that feel unnatural, your audience will hear the discomfort instantly.
Choose triggers that actually relax you. Viewers can tell when you’re forcing it, and they’ll leave.
7. Audio Quality Is 80% of the Experience
You can have beautiful video with bad, harsh audio and viewers will click away. You can have average video with clean, clear audio and they’ll stay.
ASMR audiences prioritize listening over watching. Put your main effort into getting the audio right, then worry about the video
8. Editing Should Remove, Not Add
The moment you layer effects, transitions, or background music, you’re fighting against ASMR’s core purpose. The best ASMR edit is invisible, viewers shouldn’t notice editing exists.
And to do it right, learn useful video editing tips can help you as a content creator.
Conclusion
Now you know how to make ASMR videos that actually work. You understand your room, levels, and performance. That’s 80% of the battle.
Just start. Record your first video today with what you have. Keep it real and consistent. It doesn’t need to be perfect in your first ASMR content. Grow with your experience.
And once you have great ASMR videos, the income follows naturally—from SuperThanks, ads, or even brand deals.
Or you can just join Gank and start earning from your content through donations, selling merch, or special commissions. Ready to join now?


