


You’re here to learn how to make a YouTube video, right? Maybe you’ve seen great videos from Mr Beast or Dude Perfect and want yours to be just as good from the start.
But all the talk about scripting and recording suddenly makes you nervous. You overthink your ideas, get stuck in your head, and before you know it, filming gets delayed. Does this sound like you?
Fret not, that’s exactly why this article is here. We’ll cover everything from finding your topic and how to record a YouTube video, all the way to monetization. So, let’s get started!
How to Make a YouTube Video
Here are all the steps on how to make a YouTube video that you need to know:
1. Set Your Video Goal
Your goal is the end result. Without it, every decisions seem random, and your data might not lead anywhere.
The common view on setting a goal is all about the metrics, like getting 10,000 subscribers or millions of views in a month.
This is one of the popular approaches. That’s why frameworks like SMART are used to set goals. And many content creators write these down to stay focused.
But remember, creating a YouTube video isn’t just about the final product. It’s also about the steps you need to take. And those are the input goals.
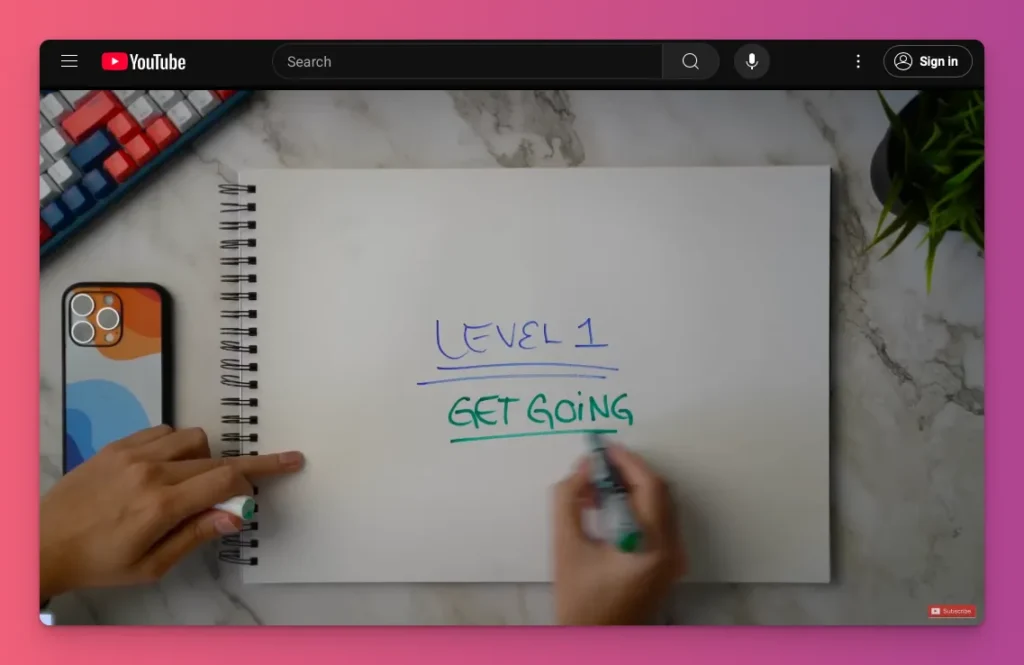
Let’s say, you decide to upload three videos a week. Like Ali Abdall says, the most important thing for beginners is just to get going.

And, goals aren’t just about input or output. They’re about the value your video provides, whether to educate, entertain, build your brand, or reach other goals.
Here’s what you need to do to make a YouTube video when it comes to setting up goals:
- Pick one main goal — don’t try to do everything like teach, entertain, build your brand altogether.
- State your goal clearly with SMART — for example “boost views by 20% in the next quarter with high quality gameplay videos”
- Set both input and output goals — For beginners, focus on input, like “Use a mirrorless camera with good lighting,” and also on output, like “Get 200 views in the first week”
- Let your goal guide every choice — scripting, thumbnails, editing — make it count
2. Find Your Topic
For beginners, making a YouTube video often means picking something they enjoy and hoping others will watch. Sometimes it works, but more often, it doesn’t.
Why? Viewers need a reason to click. Are they watching for the information you offer, or just because it’s trending? And, you need different content for each reason.
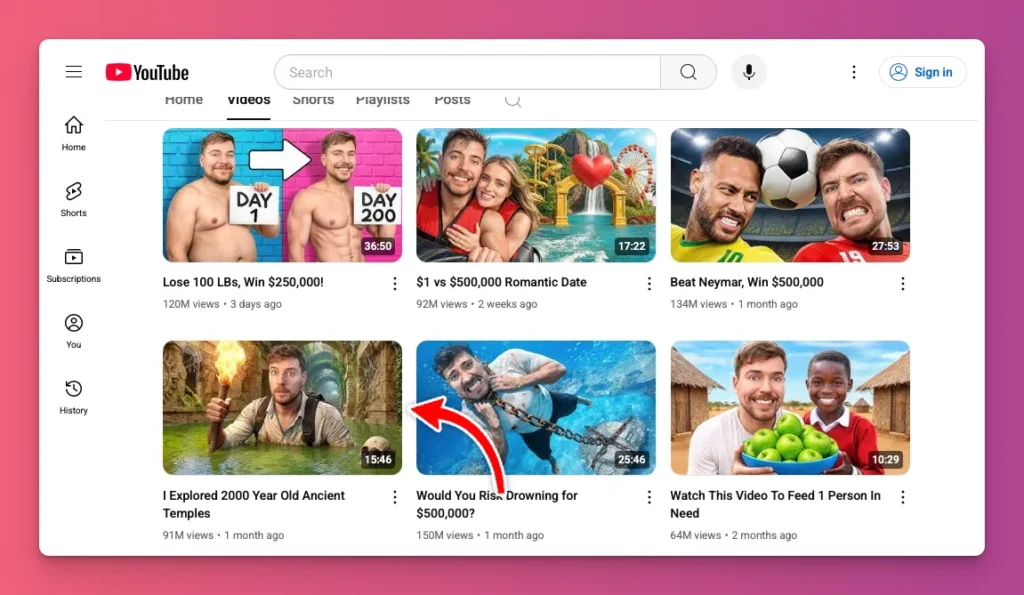
Every day, 122 million watch YouTube, with 20 million videos uploaded. Without the right topic, your video may go unnoticed.
And did you know creators often choose between viral topics that spike quickly and evergreen ones that bring steady views? You need to decide which one to focus on.
Here’s exactly what you need to do to find your topics:
- Use Google Trends — You need to check out what’s trending. Set YouTube Search, your location and niche, then pick the past 7 days or a month to see what people are searching for.
- Use YouTube search feature —Go to YouTube, search a topic, filter by this week’s upload date, and sort by view count to see the potential traffic of that topic.
- Balance your content — Go with 70% evergreen content and 30% trending topics for quick traffic.
- Check the competition — Many views mean high competition, while fewer views suggest easier ranking.
3. Choose Your Video Format
YouTube has changed. It’s no longer just about long, horizontal videos in 16:9. Now, there are Shorts, short, vertical videos up to three minutes long.
How does this have to do with how to make a YouTube video? Every time you create one, ask yourself: should you make a long video, a Short, or both?
And keep in mind that your choice isn’t just about how long the video is. It also affects how people find your video, who watches it, and how much you can earn.
Let’s say you want to make educational YouTube videos or tech reviews like Marques Brownlee.
You’ll see that his Retro Tech: Game Boy took six years to reach 40 million views, while his short World’s Largest iPhone hit 42 million in just two years.

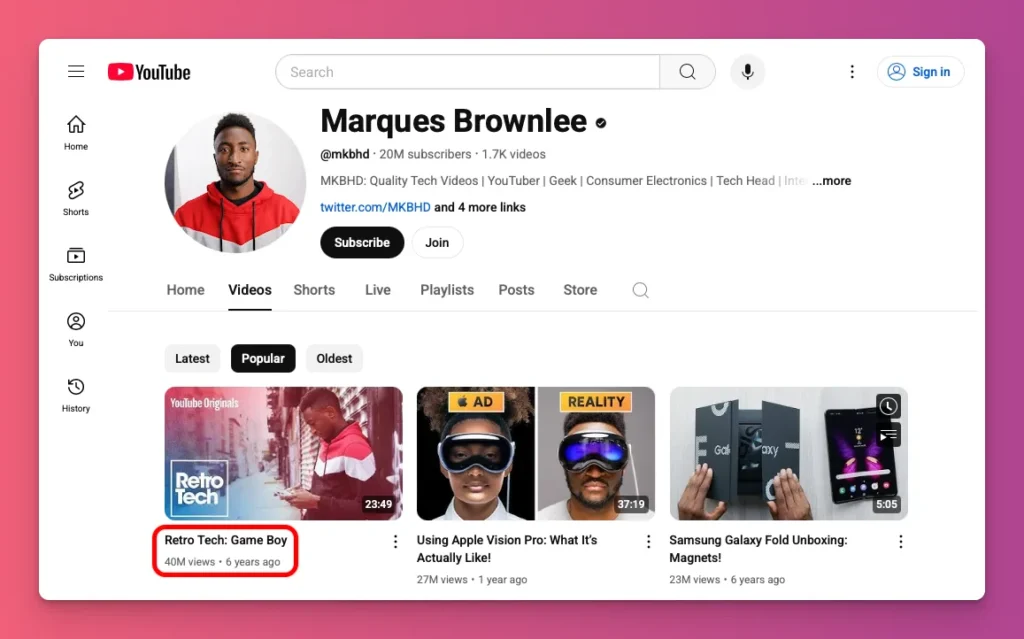
It means to go viral and attract viewers, YouTube Shorts are great. But, longer videos earn more, around $10 per 1,000 views, while Shorts bring only about 10 cents.
So, here’s what you should know when choosing your video format:
- Match your content to the format — Use long videos for tutorials or detailed stories that take time. Shorts are perfect for quick tips, reactions, or trending topics.
- Know what your viewers like — Younger viewers are all about Shorts on their phones.
- Use the 60-30-10 plan — Many top YouTubers make 60% of their videos long, 30% Shorts, and 10% live streams.
- Try Shorts first — Not sure if people will dig your topic? Make a Short first. It’s a quick way to test if your idea’s worth a full video.
- Think about your money goals — If you want to make money from ads, focus on long videos because they can earn more.
4. Know Your Audiences
Your audience isn’t just anyone who happens to find your videos. They’re groups of viewers who share traits, behaviors, and interests.
When making a new video, think about your audience’s age, gender, location, and income. Also, consider their interests, like gaming or fitness, and how they watch—short clips or full videos. Plus, keep in mind their personality, values, and lifestyle.
This is an important part of how to make a YouTube video. Even if your channel focuses on one main topic, different videos can attract different viewers. For example, a tutorial might bring in beginners.
And, YouTube doesn’t show your video to everyone right away. It first tests it with your core audience. If they click, watch, and engage, YouTube then recommends it to more viewers.
That’s why you need to make sure every time you create content for YouTube, you know who your audience is. But what are the steps you actually take for this part?
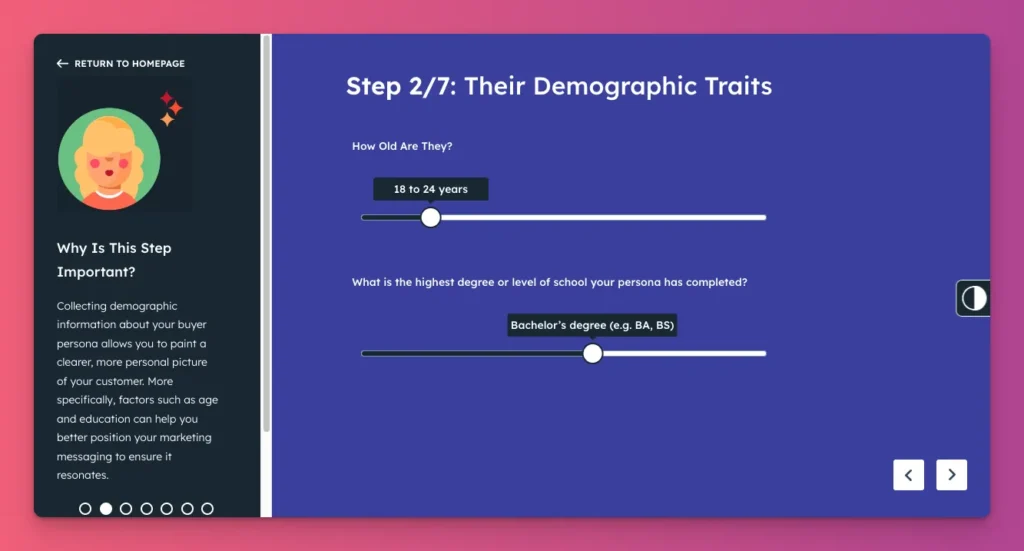
- Create an avatar persona — Use tools like HubSpot or Xtensio to create a fictional character who is your ideal viewer.
- Give your persona a backstory — Create a 200-word story aboutyour persona, mentioning their age, hobbies, problems, and YouTube habits.
- Analyze their pain points — Use the persona process to find which problems your knowledge can solve best. Then, organize your topics to show what you want to be known for.
- Read their comments – Identify patterns in questions, praise, and problems that align with your persona’s traits.
- Test your persona accuracy — Not sure about reaching a new audience? Make a quick test video first to see how people react.

5. Plan Your Content
The next step on how to make a YouTube video is to plan out your video content. Many beginners mistake a topic for a plan.
You heard that right. They come up with an idea, rush to film, and post it whenever it’s done. This chaotic workflow is the number one reason creators burn out and their channels fade away.
The “just shoot” approach can hurt your growth. Why? YouTube likes consistency. Regular posting shows commitment, which may boost views and recommendations.
Not to mention that it can also trains your audience. When they know your video is coming every Tuesday, they build a habit around you.
So, what’s the best way to plan it correctly as a step in how to make a YouTube video?
- Choose a planning system — Use tools like Trello or Notion instead of starting from scratch.
- Start with an “Ideas” column — Add video ideas with tools like TubeBuddy.
- Build a pipeline — Create steps: Ideas, Scripting, Filming, Editing, Schedule. Then use moving cards to show progress.
- Use a scheduling tool — Tools like Hootsuite can help publish videos at optimal times.
- Keep organized — Attach scripts, links, and notes to each video card to stay tidy.
6. Write a Script
How do you make a YouTube video without a proper script? Well, some creators skip scripting because they believe it will make them sound stiff.
But honestly, without it, you tend to go off-topic and lose viewers’ attention. This is especially true for beginners.
A script is your plan to give value directly. It helps you get your hook, main points, and call to action right. And that’s often the core of a good YouTube script.
The main difference lies in how YouTubers prepare their script:
- Full script — Write out every word for clarity. Good for memorizing, but can sound stiff.
- Bullet points — Use main ideas to keep your talk natural, especially if you’re comfortable with the topic.
- Hybrid — Mix both. Script key sections and use bullet points for the rest. Luckily, you don’t have to start from scratch. Many tools can help you write a script, and you can always make changes later. Some of them are Subscribr, vidIQ Script Writer, and Celtx.

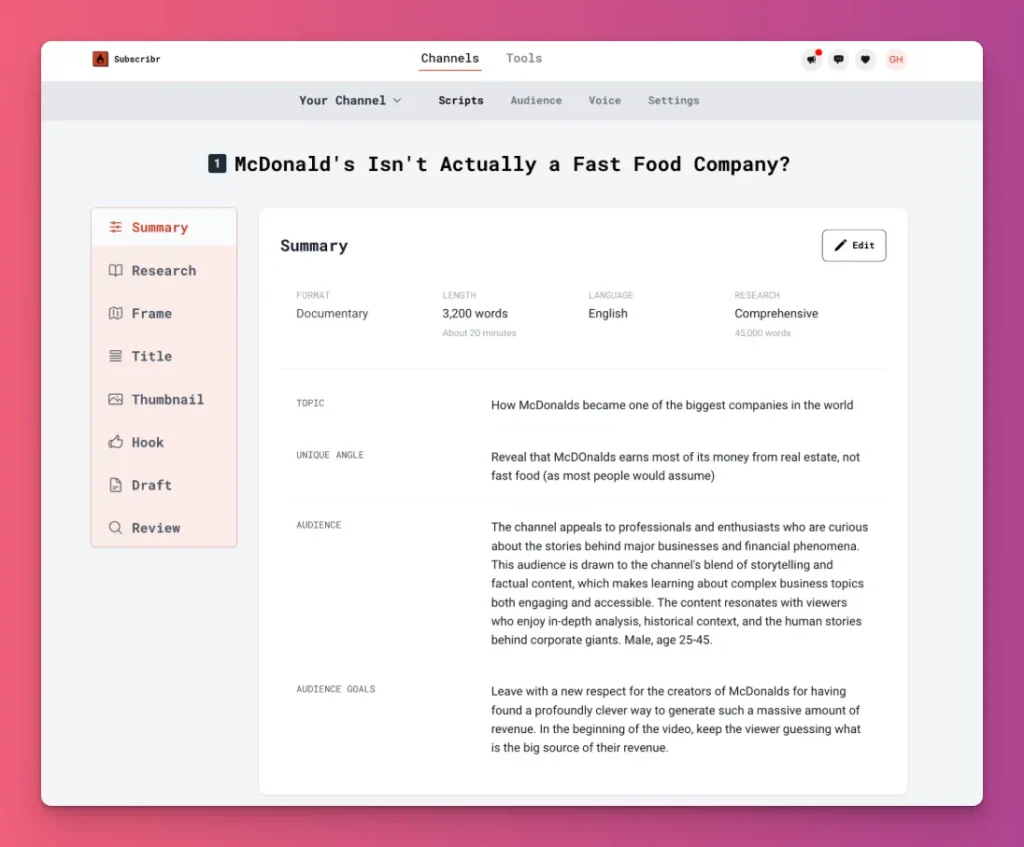
Here is what you need to do to write a great script:
- Start with a hook — Craft your first 15 seconds carefully to grab attention, as it’s crucial.
- Use a script style matching your skills — If full scripting feels limiting, list main points as bullets, showing understanding of your topic.
- Write for the ear — Read aloud to ensure natural flow; simplify awkward or long sentences.
- Add visual cues — Include notes in brackets, like [Show B-roll] or [Zoom in], to guide visuals.
- Practice with a teleprompter — Use tools like [Teleprompter] to read naturally while maintaining eye contact.
7. Make a Storyboard
A script tells you what to say or do. A storyboard shows how your video looks and moves. But do you need both for every YouTube video?
If your video is just a straightforward talking head or a simple tutorial, you can skip the storyboard. Focus on your script instead to save time.
But if you’re changing backgrounds or filming in different places, a storyboard can really help. Think travel vlogs or product reviews with many cutaway shots.
Since 42.3% of video pros make storyboards, it shows that visual story is important. And a good storyboard helps plan shots, transitions, and visuals. This saves time during filming and editing.
In general, main parts of a storyboard are:
- Panels
- Scenes
- Visual Elements
- Action Description
- Dialogue
- Camera Directions
Now, what are the steps to take when it comes to storyboarding to make a YouTube video?
- Revisit your video goals — Clarify what you want to achieve and the main message.
- Break your script — Do it for scenes or shots based on background, actions, or camera angles.
- Sketch each scene — Make simple visuals for each scene using tools like Storyboarder or Canva.
- Add notes — Give information on actions, dialogue, camera movements, and transitions for each scene.
- Check your storyboard — Review your storyboard to make sure it reflects your vision.
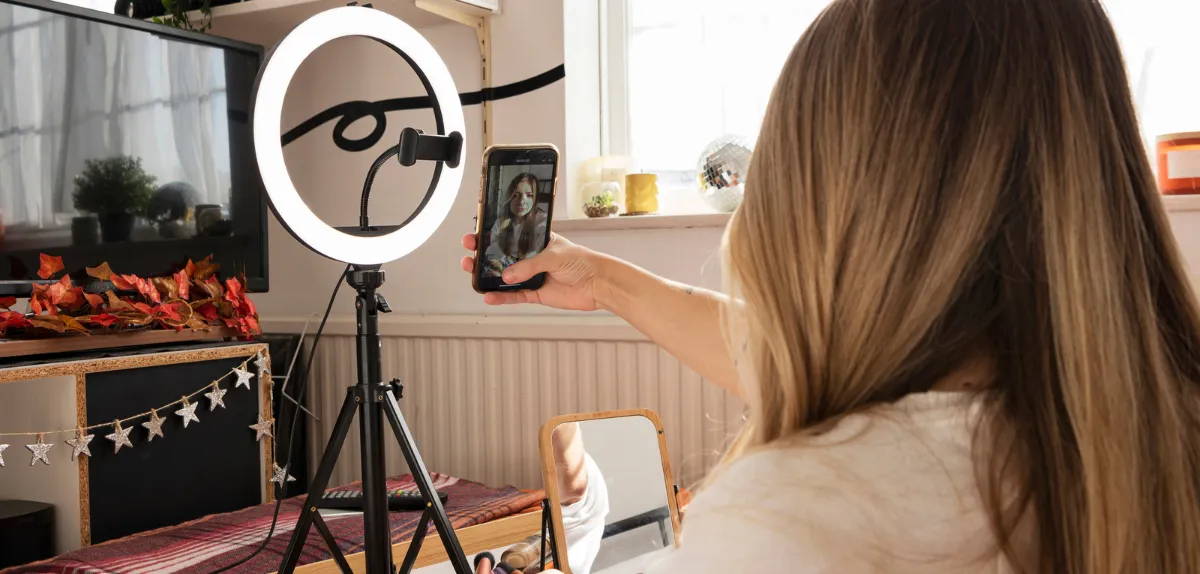
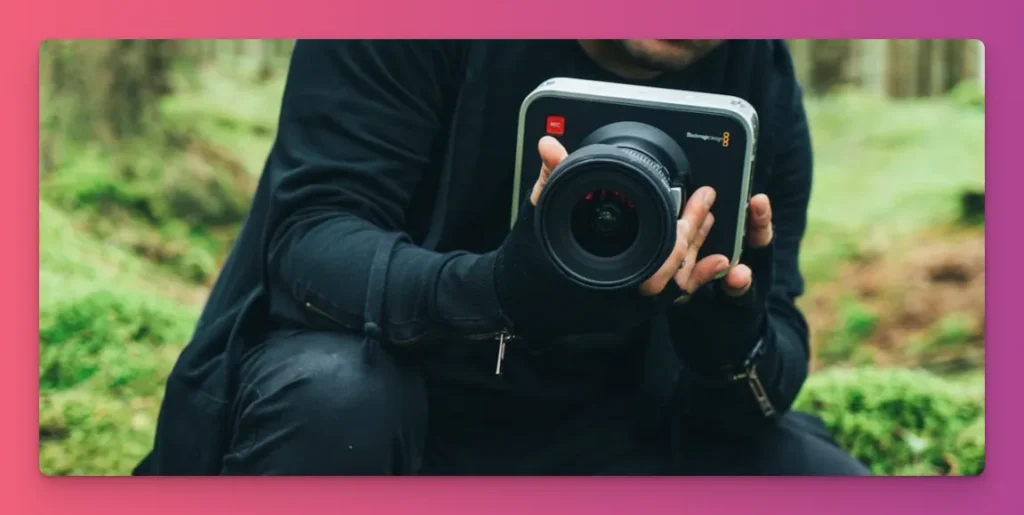
8. Prepare Your Equipment
How do you make a YouTube video without all your gear? You can’t. But it doesn’t mean you need to buy everything first.
Most successful YouTubers started with what they had and upgraded their equipment as their channels grew and their needs became clearer.
Remember, having the right gear ready keeps your content creation smooth. Forget a cable or run out of battery, and your flow stalls.
So, this is about double-checking everything needed for YouTube videos before recording, like:
- Camera
- Microphone
- Tripod
- Lighting
- Laptop with video editing apps
- Memory cards
Let’s say you have all your equipment ready. But what do you need to do to create a video for YouTube?
- Make a checklist for each shoot — Do it for camera, charged batteries, SD cards, tripod, lights, microphones, and backups.
- Set up proper lighting — For indoors, position your ring light or softbox to highlight your content.
- Keep your editing software updated — The latest update adds new features and keeps your app stable for editing.
- Have a backup plan — Bring extra SD cards, spare batteries, and a power bank. Tech issues happen, but your main moment shouldn’t wait.
9. Choose Your Recording Spot
Choosing the right spot to record often gets overlooked on how to make a YouTube video. Many settle for what’s easy or familiar, not realizing that your location can make or break your video.
For a vlogger, the wrong spot means noise and interruptions. Walking through busy areas is common, but choosing a better spot makes it easier to film smoothly.
Keep in mind that great locations do more than look nice. They tell your story. A tech review filmed at a tidy, well-lit desk feels professional and polished, right?

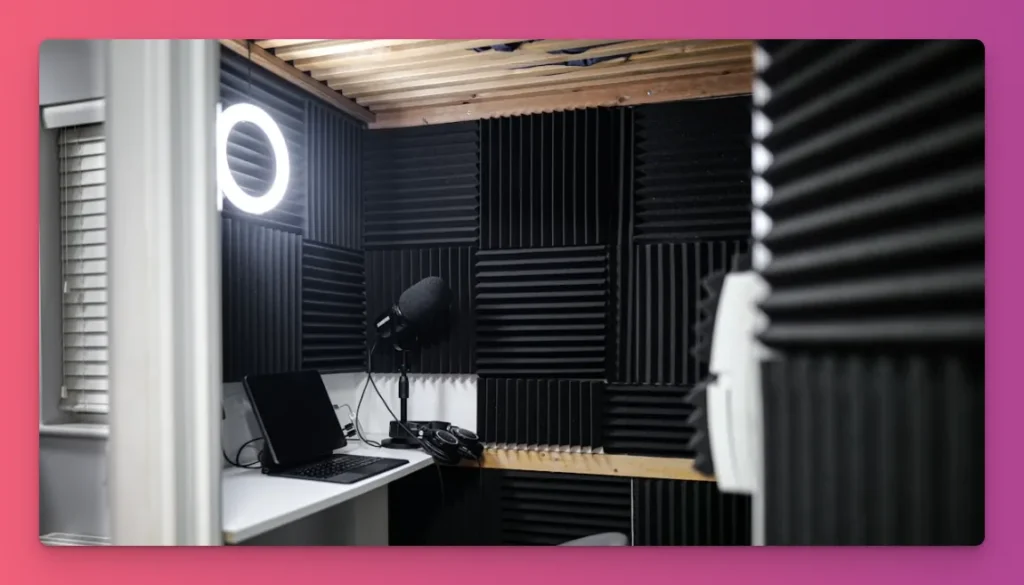
But it’s not just about noise or lighting. You also need to avoid copyright issues, things you might accidentally include in your footage.
Filming in a café, bar, or near loud music may cause sound in your audio. YouTube’s Content ID is sensitive and can flag even a few seconds of background music.
So, what you need to do when chooseing your location for a YouTube video?
- Find a quiet space for indoor shoots — Choose soft materials like velvet or canvas to reduce echo and noise. Find a quiet spot away from busy areas to stay focused and avoid distractions.
- Pick the quietest the time of day — Some rooms are quiet in the morning but noisy later. Test different times to find when your spot is quietest.
- For outdoor shoots, pick a spot with natural light — Go for the golden hours for soft, flattering glow. Avoid busy or noisy spots unless that’s the vibe you want.
- Use a microphone close to your mouth — Clip-on or boom mics are ideal for blocking background noise. Make sure to keep them close to your mouth to prevent unwanted sounds.
- Choose a location that fits your channel — The best place for your content is where your niche shines. For example, gaming YouTube videos stand out with RGB lights and a gaming chair.
10. Test Your Setup
Why plan perfectly if one missed step can ruin your recording? That’s why you should test your setup before hitting record.
Any mistake can ruin your footage. Let’s say, you do a great interview and catch a powerful moment, only to find during editing that your mic wasn’t working.
Remember, your setup isn’t just a collection of items. It’s an ecosystem. A camera from one brand, a microphone from another, and lights from a third can clash and cause problems.
Not to mention that a camera’s shutter speed can clash with your lights’ flicker. This can cause a subtle flicker in footage that’s invisible to the naked eye but ruins your footage.
To avoid that, follow these key steps in how to make a YouTube video:
- Do a quick 30-second test — Record yourself like you’re in the video, then play it back on your computer, not just the camera screen.
- Check your framing and focus — Look at your test footage. Is your shot level? Is the background clean? Is your face tack-sharp and in focus?
- Confirm your camera settings — Set the correct white balance, exposure, and picture profile. Use headphones to check your microphone and levels.
- Check your storage and battery. Make sure your SD card has enough space and your battery is over 80%. Begin shooting with a low battery is a big no.
11. Record Your Video
Hitting record is simple, but it’s a big moment. This is where all your prep work pays off. Or where it all falls apart.
This is something that often keeps creators up at night. You might have a great idea, a solid script, and top-notch equipment. But if your recording session doesn’t go well, all that work can be wasted.
And most costly mistakes happen during recording. Unlike a typo you can fix easily in a script, a bad recording due to technical problems or poor delivery is much harder to correct.
Let’s say you’re invited to make a vlog at Google headquarters, and your camera suddenly dies. Or you’re testing a gadget, and it doesn’t work right. Sometimes, there is no restart button for this.

Also, recording isn’t just technical. It’s about how you present yourself. Even when sharing your screen, your energy, focus, and clarity are key to engaging viewers.
Here is what you need to do to record your video:
- Create a “recording bubble” — Pick a specific time to record. Silence your phone and put it away. Close other tabs and tell roommates not to bother you.
- Record in small takes — Split your script into sections: intro, main points, and conclusion. Then, record each one separately.
- Follow the “Rule of Threes” — Record each take three times: the first to warm up, the second to capture your best, and the third to refine.
- Look directly into the lens — Direct eye contact builds trust and engagement. Make sure you do this during filming.
- Use planned pauses. Don’t rush your script. Pausing helps viewers absorb information, adds impact, and gives you natural spots for B-roll.
12. Review Your Footage
After the adrenaline of a recording session, you might feel excited to start editing right away. But wait, are you sure you have all the footage you need? Is everything good to use?
Hurrying to the next step can be a trap, even for experienced pros. Why? Because the creator’s mind is focused only on finishing.
You’re excited, but deadlines and a busy schedule stress you out. Reviewing and organizing feel like delays. The pressure makes you want to start editing quickly. But is that really what you want?
Let’s say you’re a gaming YouTuber. You just wrapped up a two-hour horror game session. You transfer your footage like gameplay, facecam, and microphone audio to your computer.
Without a proper review, you delete a dull 10-minute clip of you walking down a dark hallway. Later, you realize it captured your perfect jump-scare reaction. Now, your story has a big gap.
That’s the last thing you want after you finish recording a video, right? That’s why reviewing your footage is important.
- Create a folder structure — Before importing, set up a master folder with subfolders: 01_Footage, 02_Audio, 03_Project_Files, 04_Final_Exports.
- Audit footage — Watch everything initially, marking good takes and flagging issues like bad audio or lighting.
- Quarantine, don’t delete — Move unusable clips to a “Rejects” folder. They might contain useful moments.
- Build a “Selects” timeline — Create a sequence with only the best clips, providing a clean source for editing.
13. Edit Your Video
When you hear “edit,” you might think of just cutting out ums and ahs. But editing your YouTube videos is more than that. It’s when footage turns into a story.
This is where most creators work hard. Editing involves many small decisions that affect the final video. It’s easy to get stuck on clips, doubt choices, and spend time on details that seem important.
Think about it. You’re a fashion influencer making a “Get Ready With Me” video. You have your main footage of yourself and B-roll of makeup.
For music, do you pick a chill lo-fi beat or a trendy pop song? When moving from foundation to eyeshadow, do you do a simple cut or a stylish whip-pan?
So, editing is a series of careful choices. It gets even harder when your video editing app has tech issues.
For example, a big update to Adobe Premiere Pro might rearrange the Lumetri Color panel, forcing you to relearn its layout and slow your workflow.
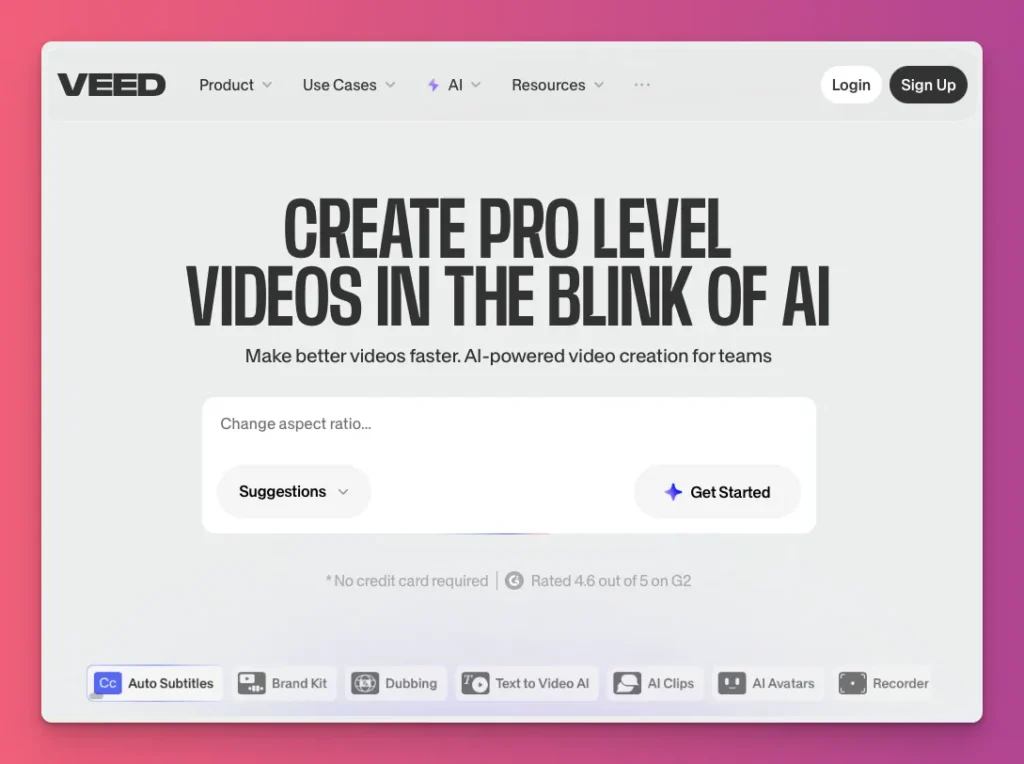
And switching from Final Cut Pro’s magnetic timeline to Premiere’s track system can also feel unfamiliar and disrupt your rhythm. Or, maybe you’re curious to try Veed? All this happens while you’re facing a deadline.

So, how to go through the editing process efficiently:
- Start with a rough cut — Put your main clips (A-roll) in the right order. Focus on the main story or the steps of the tutorial. Don’t worry about making it perfect yet.
- Trim relentlessly — Remove anything that is boring. And if a clip doesn’t help the story, delete it.
- Use B-roll to “show, not tell” — When talking about a product or technique, use a close-up shot.
- Sound is 50% of your video — Spend time on sound design. Use services like Epidemic Sound to find music and sound effects. These can match the mood and make moments stand out.
- Color correct, then grade — Always do this last. First, correct clips for natural, consistent look. Then, grade to set the mood or style like warm, or cinematic.
Related: Video Editing Tips for Content Creators
14. Export Your Video
Your content is nearly finished. After hours of editing, it’s time to see if it’s ready to upload to YouTube.
This isn’t just the last click. It’s the vital step to turn your complex project into a single, high-quality video that can handle YouTube’s compression. One mistake here can ruin all your hard work.
Think about it. You spend hours color-grading footage to make that new smartphone’s screen pop. But if you export with the wrong color space, it looks dull and washed out. The real shine gets lost.
Also, if you pick a bitrate that’s too low, all that sharp 4K detail you put in will look blurry once YouTube finishes with it. All your work is wasted, not due to a bad edit, but due to a bad export.
So, understanding key export settings is important. The codec handles encoding. The bitrate impacts quality. The frame rate should match your footage for smooth motion.
Here’s what you need to do to export your video right:
- Choose the right format and codec. Use MP4 with H.264 for broad compatibility. For 4K, H.265 offers similar quality in a smaller file.
- Set the correct bitrate. For 1080p, try to use 8-15 Mbps. For 4K, use 35-68 Mbps. Higher bitrates keep more details when compressing the video.
- Match your source settings. Keep the resolution and frame rate consistent, like 1920×1080 at 30 fps, to match your project and avoid problems.
- Use VBR 2-pass if you can. In Premiere Pro, choose Variable Bitrate (VBR), 2-pass. This makes the software look at your video two times. It gives more data to busy scenes with lots of action and less to simple scenes. This helps make the video look better for its size.
- Check your export range. Set your in and out points carefully to avoid exporting extra clips or empty space.
Related: YouTube Video Size Optimization
15. Make An Awesome Thumbnail
MrBeast straight-up said that “everything you want as a creator comes from making the best video possible… and thumbnails.”
You’re not going to ignore these tips from one of the most subscribed YouTubers, right?
Creating a killer thumbnail isn’t just an afterthought. It’s key to your video’s success. Thumbnails and titles are what viewers see first, and they decide if someone clicks or keeps scrolling.

Look at MrBeast’s thumbnails. They use bright, bold colors that stand out on YouTube. Their creative and strong designs, along with clear main points, make them hard to ignore.
And it’s not just about looking flashy. Misleading thumbnails might get clicks, but they make viewers bounce fast, hurting your channel.
Here’s what you need to do to make thumbnails that work:
- Pick the right tools — Go for beginner-friendly apps like Canva or Snapseed, or use Photoshop if you’re more advanced. AI thumbnail makers like Veed can also save you time.
- Choose a killer image — Use a clear, high-quality photo. It can be a custom shot or a sharp screenshot that hints at your video’s vibe.
- Get the size right — Make your thumbnail 1280 x 720 pixels with a 16:9 ratio. That way, it’ll look sharp in all devices.
- Use your brand colors — Blue, green, or yellow? Use these colors in your text, borders, or backgrounds. Keeps everything looking consistent.
- Keep file size under 2MB — Export as JPG or PNG so it loads fast and meets YouTube’s specs.
16. Upload Your YouTube Video
It’s time to upload. This step prepares your video to go live. The details you include here affect how YouTube finds, recommends, and shows your video to the right viewers.
Your title, description, tags, and metadata are how YouTube’s algorithm understands your video.
To upload your video, go to youtube.com. Then, hit the Create button and select Upload Video. Drag your file or choose it from your device. After that, add a clear title and description.
Set your audience and who can see it. You can then choose a thumbnail that shows what it’s about.
Beyond metadata, set the visibility to public, private, or unlisted. Then, add playlists, YouTube chapters, end screens, closed captions, and cards to increase watch time and engagement. When you’re ready, click Publish to go live.
Here’s what you need to focus on during the upload process:
- Create a catchy title — Use keywords naturally to show YouTube what your video is about. Be honest and engaging to avoid clickbait backlash.
- Write a solid description — Summarize your video with keywords, and include links to your socials, website, or related videos. It boosts SEO and keeps viewers connected.
- Add tags and hashtags — Tags matter less now, but they still help categorize. Use 5-10 focused keywords plus a few trending hashtags for your niche.
- Pick the right time to publish — Don’t just hit publish right away. Check YouTube Analytics to see when your audience’s most active and schedule your upload for those prime times.
- Organize into playlists — Add your video to relevant playlists to boost views and keep viewers watching.
Related: How to Upload YouTube Shorts
17. Monetize Your Content
Your videos are live. So, what’s next? If you want to earn from your YouTube videos, start thinking about monetization. But, it’s not just random payments, but a steady income.
YouTube offers built-in options: ads, Super Thanks, channel memberships, and Shops. But, to qualify, you need at least 500 subscribers, 3,000 watch hours in the past year.
Looking for other options? How about creating awesome content that attracts brands to sponsor your posts? That works for many YouTubers and generates a lot of money.
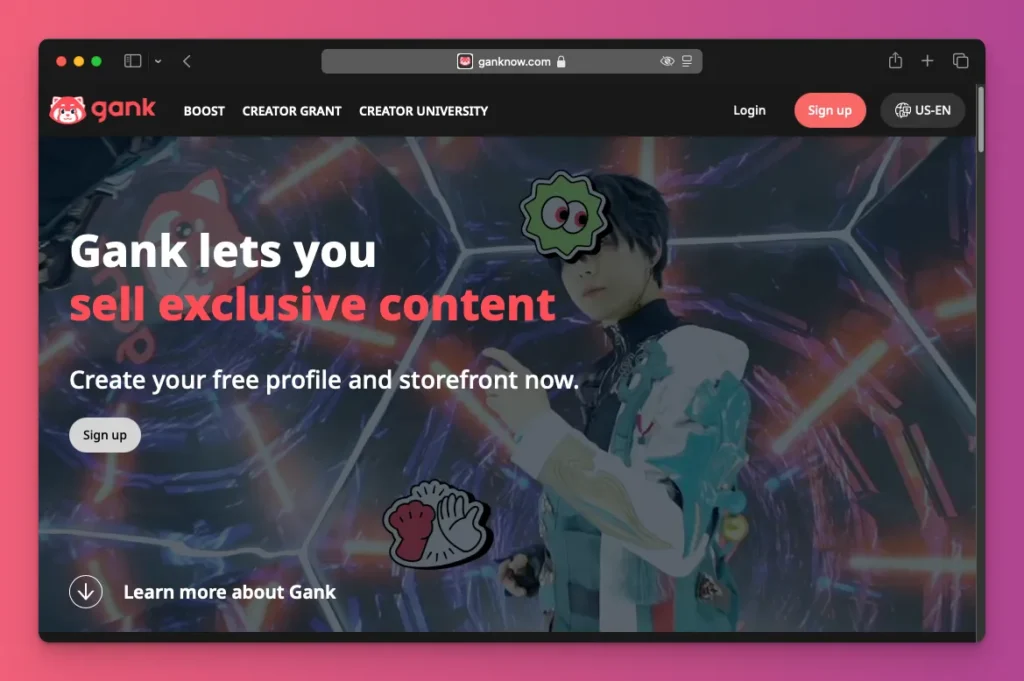
But if you’re looking beyond YouTube, platforms like Gank let you earn through donations, merchandise, and memberships as a YouTuber. All while you wait to qualify for the YouTube Partner Program.

Awesome, right? But, how much do YouTubers make? It depends on their content and subscriber count. Top creators like MrBeast earn over $53 million a month from brand deals, ads, and more.
So, how do you make a YouTube video with the best quality and earn money from it?
- Start with the YouTube Partner Program (YPP). Get 500 subscribers and enough watch time so you can unlock ad revenue, Super Thanks, and memberships.
- Use third-party platforms early. While waiting for YPP approval, set up Gank so it can accept donations and memberships. This way, you can get money right away from your loyal fans.
- Use affiliate marketing. You can promote products you genuinely like with affiliate links in your descriptions to earn 5%–20% commissions per sale.
- Look for brand deals — Brands pay creators like MrBeast $2.5 to $3 million per sponsorship. You might not start there, but focusing on a niche can open doors to brand deals later on.
- Diversify your income streams — Don’t just rely on ads. Mix in affiliate marketing, sponsorships, merch, and fan donation. That way, you’ll make steady cash and grow your income over time.
Related: How to Be a YouTuber
How to Make YouTube Videos: A Wrap Up
You’ve learned how to make a YouTube video. It might seem like a lot, but just take it one step at a time.
Start by figuring out your goal and planning your content. Then move on to filming, editing, and uploading. Each step helps bring your ideas to life and makes your video stand out.
Once your video is live, you can explore ways to grow your channel and monetize your content. Ads and affiliates are great. But with Gank, you can also earn through donations, memberships, and merch as a YouTuber.
That’s it for now. If this helped you learn how to make YouTube videos, you can subscribe for more tips and guides on creating awesome content.


