


Thinking about going live on YouTube? That’s a great idea. The platform stands out with its huge global audience and awesome features. But do you know how to live stream on YouTube?
You just need to enable the livestream feature, set everything up, and hit “Go Live.” It’s simple, but it can help you get more followers and open the opportunity to monetize your content better.
Curious? Let’s find out more about how to go live on YouTube. We’ll also share some helpful tips to make the most of it to grow your channel. Let’s dive in.
What is YouTube Live?
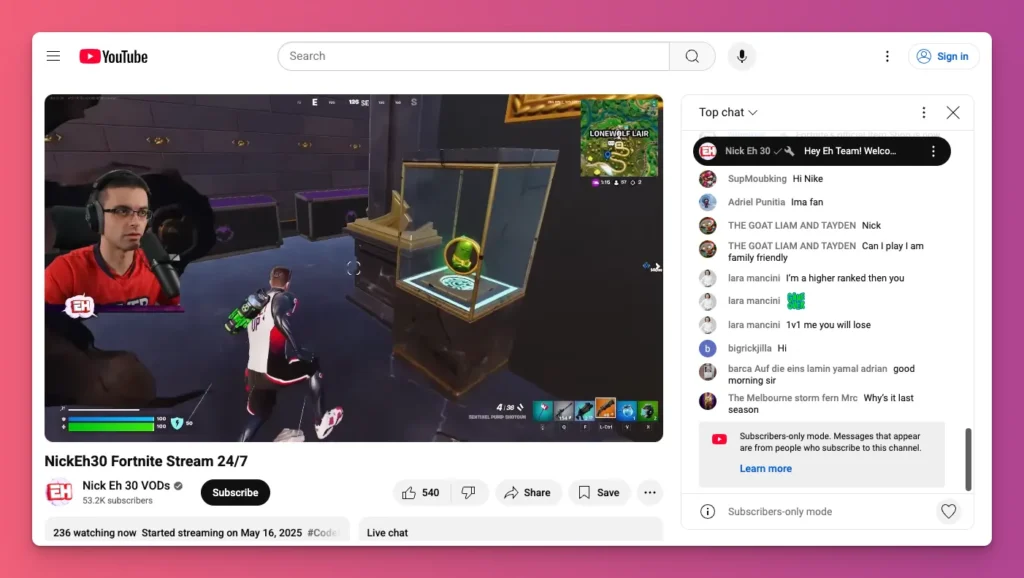
YouTube Live is a real-time streaming feature built into YouTube. It lets you broadcast video live, whether you’re hosting an acoustic concert, giving a tutorial on cosplay, or sharing gameplay.
Once you go live on YouTube, your viewers can join in, comment through live chat, and participate with polls or reactions. All while you’re streaming.
So, it’s more interactive than just sharing pre-recorded videos. Yes, going live on YouTube means more than just creating content. It’s a way to grow your audience as a content creator.
And why choose YouTube over Twitch, TikTok, or Instagram? It has unique features the others don’t have. Overall, YouTube Live is great because of its awesome features, like:
- Q&A — A feature that lets your viewers send in questions while you’re live on YouTube. It’s great for tutorials or educational streams, like sharing gameplay tips.
- Polls — You can set up live votes during YouTube streams to get your audience involved with real-time results. You can use this to get ideas for your content or just ask people’s opinions.
- Super Chat — A feature lets your viewers pay to make their messages stand out in your live stream’s chat.
- Cross-channel Live Redirects — Yes, you can think of it like a Twitch Raid. After your stream ends, you can send your viewers to another live stream or Premiere on YouTube.
- Go Live Together — It’s a way to collaborate with other content creators. You can invite guests to join your live streams. You’ll both appear side by side on the screen.
- Automatic captions — Enabled for English, this feature generates real-time captions for your live broadcast on YouTube using advanced speech recognition technology.
- Trailer — You can upload a trailer for your upcoming live stream on YouTube. This way, viewers won’t see a blank screen while they wait for your scheduled stream to start.
- Longer duration — Instagram Live lasts up to 1 hour, Facebook Live up to 8 hours, while Twitch Live‘s maximum is 48 hours. But YouTube allows even longer streams with the last 12 hours of your stream are saved.
And YouTube Live works with a range of video resolutions, from 240p up to 4K. Plus, it supports frame rates up to 60fps.
Why that matters? Your viewers can watch your stream smoothly, no matter their internet speed or device. It transcodes your stream to create different versions of your video.
What’s also great about YouTube Live is that it gives you many ways to stream. PC streaming suits simple setups with webcams. Mobile streaming allows quick, spontaneous broadcasts.
How to Live stream on YouTube in Minutes
These are the steps to live stream on YouTube using PC or laptop:
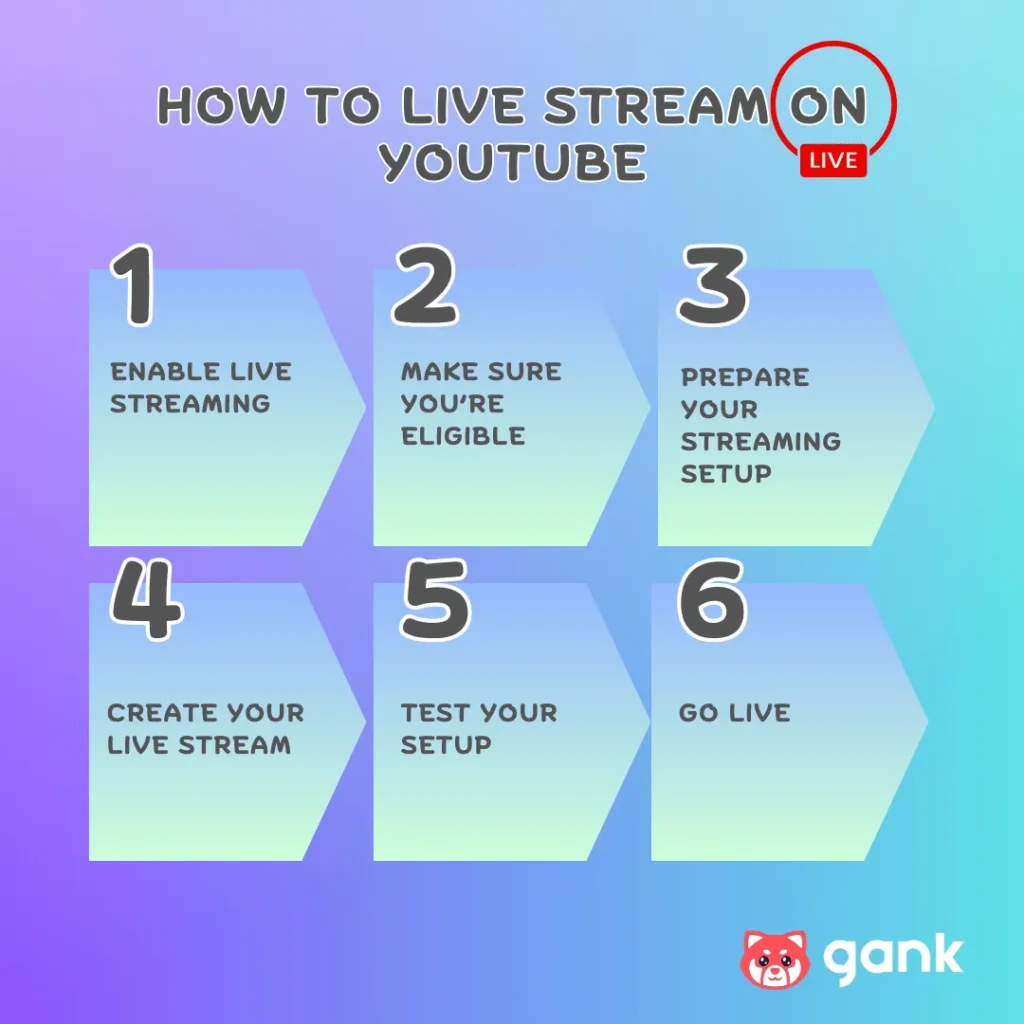
1. Enable Live Streaming on Your Channel
You can’t go live on YouTube until you turn on the live streaming feature on your channel. It’s a one-time setup, but imake sure you do it. Here’s how:
- Login to Your Account — Go to youtube.com in your browser and log in with your Google account.
- Click to the Create Icon — Click the Create camera icon with a plus sign at the top right of YouTube’s homepage. Then choose Go Live from the dropdown.
- Create a Channel — If you don’t have a channel, it’ll ask you to create one. If you do, you’ll be taken straight to the YouTube Studio.
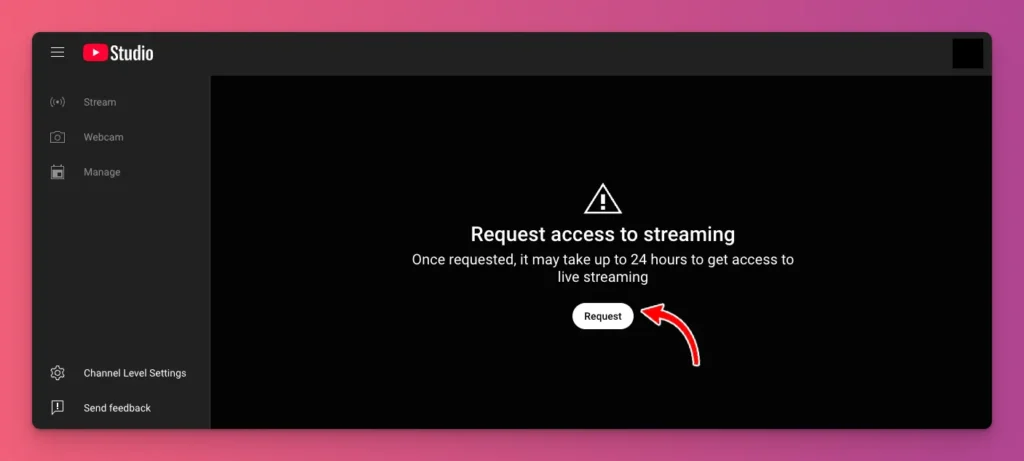
- Request Access to Streaming — From there, you’ll see a prompt to request access for the live streaming feature. Just click Request.
- Verify Your Channel — You’ll need to verify your channel before you can continue. Just click on verify, and you’ll be taken to youtube.com/verify. Follow the instructions and enter the code sent to your phone.
- Wait for Activation — After your channel is verified, it may take up to 24 hours for the live streaming feature to activate. Wait until the process finishes before starting a live stream.
2. Make Sure You’re Eligible
Once you’ve enabled live streaming and completed verification, you’re all set. To keep YouTube safe and friendly, there are a few requirements to meet:
- No Community Guidelines strikes or livestream restrictions in the past 90 days.
- You are over 13 years old, and live streaming feature is available in your country.
3. Prepare Your Streaming Setup
It’s time to get your streaming setup ready so everything runs smoothly. Here’s what you’ll need:
- Computer — You need a computer to run your streaming software. For a basic setup, choose a PC with a multi-core processor like an Intel Core i5 or AMD Ryzen and at least 8GB of RAM.
- Internet Connection — Use a wired Ethernet for better reliability. Make sure your upload speed is at least 3-6 Mbps for 1080p streaming. But, higher speeds are preferable.
- Webcam — A built-in laptop webcam or basic models like Logitech C920s or Brio are good for beginners. You can also use your phone’s camera if you want.
- Microphone — A dedicated mic can improve sound over the built-in one. The Blue Yeti or HyperX SoloCast are popular and easy to set up. Or you can just use your headset mic.
- Streaming Software — For advanced setups with overlays or multiple cameras, you can use free software like OBS Studio or Streamlabs.
4. Create and Set Up Your Live Stream
Once your streaming setup is ready and you’re eligible to go live on YouTube, you can go ahead and start creating your live stream. Just follow these steps:
- Create a Live Session — Go to YouTube, and click the Create icon in the top right corner, then choose Go Live.
- Allow Camera and Microphone Access — On your first setup, your browser will prompt for microphone and camera access. Click Allow.
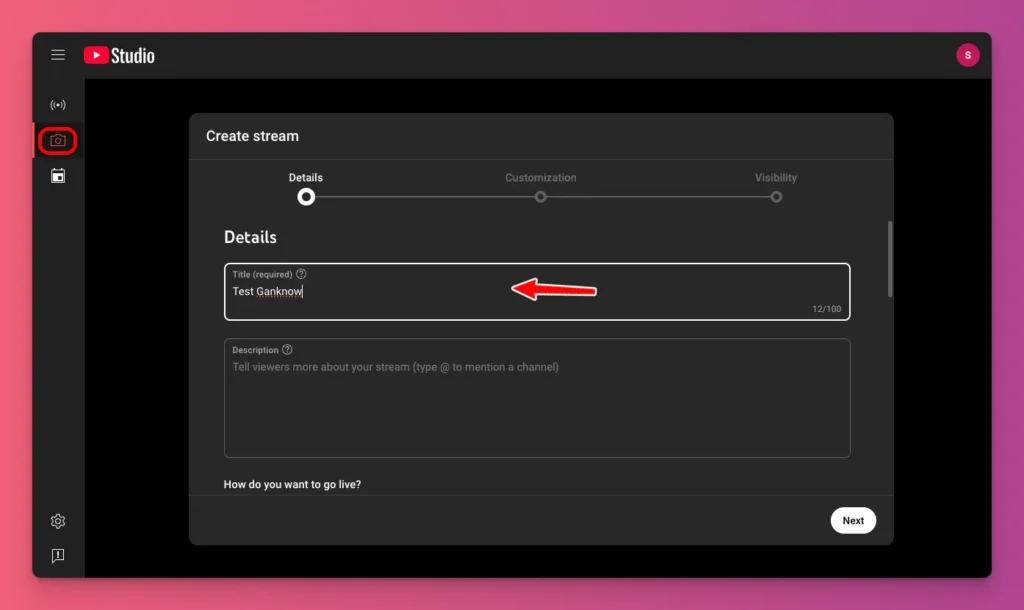
- Choose Your Stream Type — In the Live Control Room, select Stream or Webcam. Webcam is for simple streams like Q&A or updates, while Stream suits gaming or live music, offering more control, multiple cameras, and screen sharing via streaming software.
- Enter your stream details — You can add your live streaming title and description. Then, choose a category, and upload a thumbnail.
- Set Your Privacy — Remember to set your live stream privacy: Public (anyone can watch), Unlisted (link only), or Private (just you or selected people).
- Customize Advanced Settings — You can also enable or disable live chat, set age restrictions, add your stream to a playlist, and choose monetization options if eligible.
5. Test Your Setup
Before you go live, always test everything to make sure a smooth. The steps to do are
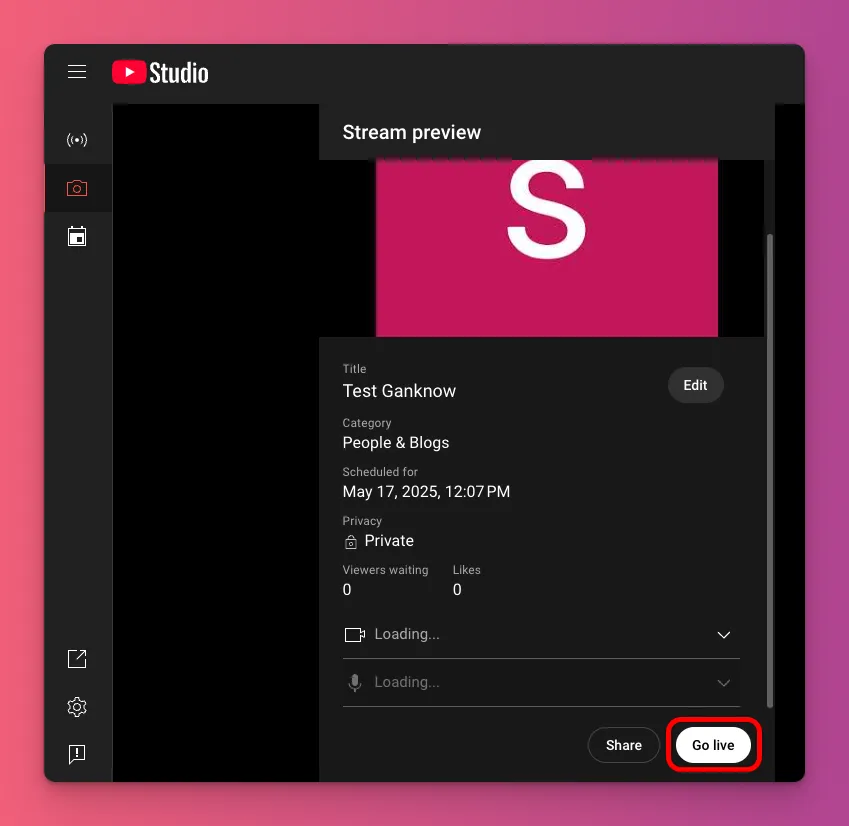
- Check Your Stream Details — Before going live, YouTube provides a stream preview to verify all information, including title, category, privacy, as well as video and audio sources.
- Preview Your Stream — In the YouTube Live Control Room, check your camera angle, and sound levels.
- Test Your Internet Connection — Before going live on YouTube, check your internet with websites like speedtest.net to make sure great internet speed and avoid lag.
- Run a Short Private or Unlisted Test Stream — If needed, you can run a private live stream test first to make sure everything works before going public.
6. Go Live and Manage Your Stream
When you’re all set, just hit the Go Live button, and you’ll be live in front of your audience.
Make sure to engage with your viewers. Try using polls or Q&A to keep things interactive. Keep an eye on the chat and respond to questions or comments as they come in.
When you’re ready to wrap up, just click the End Stream button, and then you can save or share the archive later.
Read: How to Go Live on Twitch
How to Live Stream on YouTube on Mobile
So, how do you live stream on YouTube directly from the app? Here are the steps to get you started.
1. Meet the Requirements
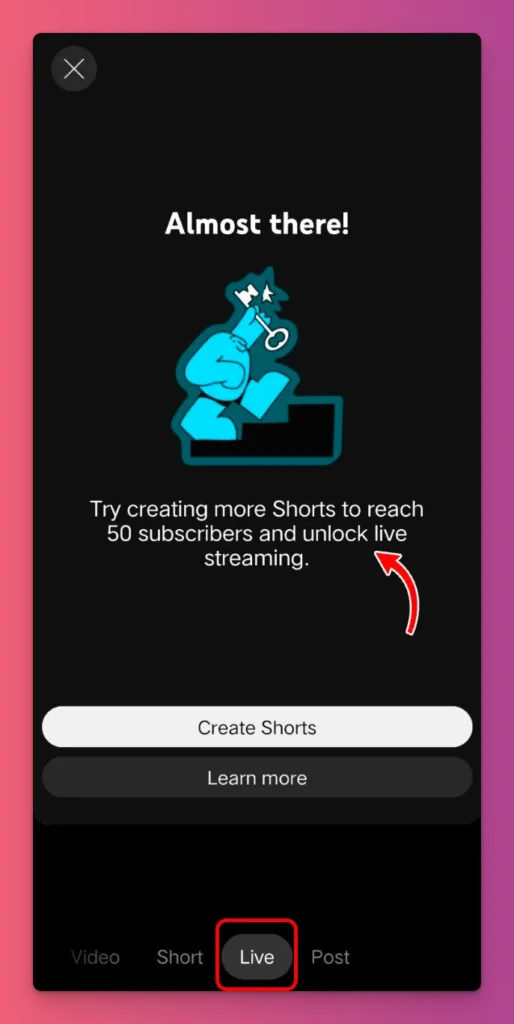
When streaming live on YouTube from your PC, no subscriber count is needed. But, streaming from your phone requires meeting specific requirements.
- Your channel needs at least 50 subscribers.
- You shouldn’t have any live streaming restrictions or strikes in the past 90 days.
- Your channel must be verified.
- You need an Android device running version 5.0 or higher.
- Make sure you have the latest version of the YouTube app installed.
If you don’t qualify, you’ll get a message telling you to create more content and get more subscribers to become eligible.
2. Make Sure Your Device Ready
When you’re eligible, you don’t need many tools to go live on YouTube from your phone. But, it’s a good idea to make sure your phone is all set.
- Make sure your phone is fully charged or plugged in.
- Close unnecessary apps to free memory and avoid interruptions.
- Turn on Do Not Disturb to block notifications during your stream.
- Use a tripod for steady shots, unless you’re live on the go.
3. Enable Livestream Feature
You’re now ready to go live or schedule a stream in advance. What do you have to do?
- Open the YouTube app
- Tap the Create (+) button at the bottom of the screen.
- Choose Live, next to Shorts
- If it’s your first time, you might see a prompt saying activation can take up to 24 hours.
4. Set Up Your Stream Details
If your YouTube channel has live streaming enabled and meets all requirements, tapping the live button in the app takes you to a page to enter stream details.
- Title — Make a clear title that shows what your live stream is about.
- Description — Add details, links, or messages to help viewers understand your stream.
- Privacy — Pick who can see your stream: Public, Unlisted, or Private.
- Category —Choose the best category so new viewers can find you easily.
- Thumbnail — Take a photo or upload an image to make your stream look good.
- More Options — Tap “More options” to turn on live chat, set age limits, earn money, or change other settings.
5.Preview Your Stream and Go Live
If everything looks good, just tap the “Go Live” button. But it’s a good idea to preview your stream first to find any problems before going live.
And when you’re ready, tap Go Live. Your video will start, and people can join right away. While you are streaming:
- You can switch between the front and back cameras to show different views.
- Use features like filters or polls to make your stream more fun.
When you are done, tap Finish or the “X”” button to stop your broadcast. YouTube will automatically save a copy of your stream to your channel.
Why Should You Go Live on YouTube
You know how to enable live streaming on YouTube and go live. But should you do that? Here are some reasons:
1. You Can Grow Your Watch Time Faster
You should learn how to go live on YouTube because it can boost your watch time. Streams tend to get about 25.7 minutes on average, compared to 19.6 minutes for on-demand videos.
2. You Stand Out in YouTube’s Algorithm
Not only will you get more watch time, but live streams also generate higher engagement. When you go live, your viewers gets notification. This increases the chance they’ll watch it.
The more views you get, the more engagement occurs. This makes YouTube feel more confident to promote your stream and channel. This helps your channel to grow fast.
3. You Can Make Money A Bit Faster
After reaching 500 subscribers and 3,000 watch hours in 12 months, you can go live and earn through Super Chat and Super Stickers.
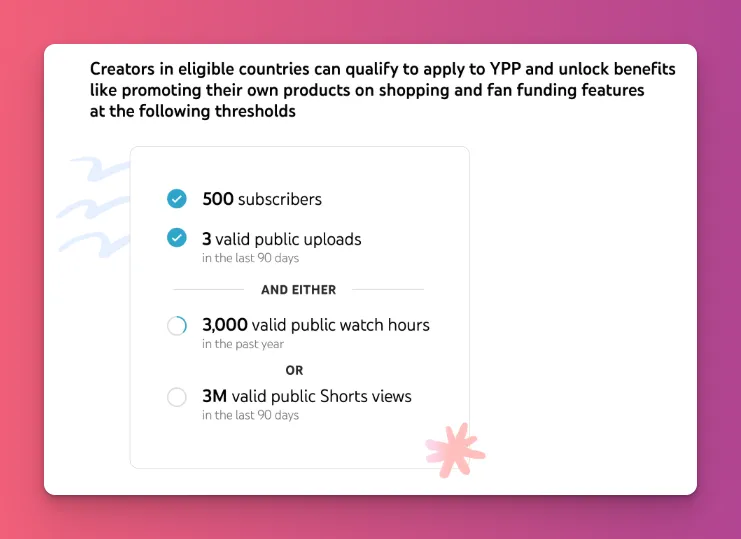
This is relatively easier than the 1,000 subscribers and 4,000 watch hours needed for getting money from the ad revenue. That’s a key reason to go live on YouTube if yzou want to go pro.
Read: How to Make Money on YouTube
4. You Get Direct, Real-Time Feedback
Audience feedback matters. And going live on YouTube makes it easy to get that right away. Instead of waiting days for comments, live streaming shows you if your viewers like your content.
5. You Create Great Content While Live
Think of going live on YouTube as an efficient way to create on-demand videos. Once you’re done, YouTube saves it as a regular video, so anyone who missed it can watch it later. You can even turn live stream content into Shorts, which often get more views and likes.
6. You Can Build a Loyal Community
Viewer count matters. But having a loyal community is what keeps your career going. The key is interaction. When you call your viewers by name, or feature their comments, you create a real two-way connection that builds strong bond.
7. You Can Collaborate Easily
Working with other YouTubers might not be easy. You need to coordinate schedules, align your styles, and maintain a consistent brand. These are common challenges in collaboration.
But with YouTube Live, most collaboration becomes simpler. It happens spontaneously, requiring less planning and editing. Plus, your audience doesn’t expect perfection.
8. You Don’t Need Fancy Equipment
Many creators start with just their phone’s camera when going live on YouTube. As their channels grow, they upgrade their gear and try more advanced equipment.
You can do the same with mobile live streaming. This lets you focus on connecting with your audience and improving content without big upfront costs.
9. YouTube Live Has Great Unique Features
YouTube Live stands out from Twitch, TikTok, and Instagram with features they don’t offer. You can stream for hours nonstop, with only the last 12 hours saved.
Also, you can add a trailer before your premiere to build excitement, and automated captions make your content more accessible.
Read: Top YouTube Alternatives
Pro Tips for Live YouTubers
You already know how to go live on YouTube, and why you should. Here are some quick tips to make your live streams even better:
1. Stream to Multiple Platforms
Simulcasting lets you stream your live video from platforms like YouTube Live to many platforms at once. It helps you reach more people and attract different viewers.
To simulcast, use a streaming program like OBS or Streamlabs. Set preferences, link Twitch or Facebook, then start streaming. This could boost your views by 231%.
2. Promote Early
Don’t wait until the last minute to announce your stream. Give your viewers time to get ready and set reminders.
You can share the link on X or Instagram. Or you can post in your community to let your subscribers know about the event. And before you go live, play a trailer to build some excitement.
3. Focus on a Single Topic
When you focus your stream on one main topic, it’s easier for viewers to know what to expect. This attracts the right people and keeps them interested. Everyone’s there for the same reason.
A title like “Creating a Marvel Spider-Man Cosplay” with a thumbnail of the costume in progress clearly shows what it’s about. It grabs cosplay fans’ attention and invites them to watch.
4. Go Live at the Best Time for Your Audience
The biggest mistake is going live when no one’s watching. Usually, the best time to post a YouTube video is Tuesday at 2 PM. But does that apply to YouTube Live?
The best way to find out is through YouTube Analytics. Open YouTube Studio and click on the Audience tab. There, you’ll see the times when most viewers are active.
5. Use Live Automatic Captioning
It’s available in English. So, just turn on automatic captioning for real-time captions during your YouTube Live. It’s an easy way to make your content more accessible.
Please note that about 80% of Gen Z watch videos with captions. If your content reaches them, turn on captions during your YouTube Live streams to keep them interested.
6. Repurpose Your YouTube Livestream
YouTube Live saves videos under 12 hours when you enable Automatically archive live streams. It turns live streams into on-demand videos. You can then use Edit into a Short to make Shorts.
This helps reach more viewers who might skip full streams and allows you to create new content without starting from scratch.
7. Use Polls for Engagement
Live Polls are a fun feature on YouTube Live that you can’t miss. They let you ask questions and get your viewers’ answers right away in the live chat.
Just ask a question, like “Which game should I play this weekend?” and see their answers. It’s a quick way to turn viewers into participants and make your stream more lively.
8. Optimize Your Stream Quality in Real Time
YouTube Live has a Control Room for streamers to monitor their stream’s health in real time. It can track resolution, bitrate, frame drops, and connection status.
This allows for live optimization. If you face issues like stuttering, adjust your streaming software or hardware. For example, you can switch from 1080p to 720p to improve quality.
Read: How to Improve Your Stream
So, How to Livestream on YouTube?
You know how to go live on YouTube, right? Just open the app, tap Create, then “Go Live.” No fancy equipment needed to get started. You can even stream directly from your phone.
Now, focus on creating quality livestreams to grow as a professional on YouTube. Then, you can earn money through YouTube Live monetization features like Super Chat or Super Stickers.
You can also join Gank to sell merchandise, get fan donations, earn commissions, and set up memberships. Interested, you can sign up for free now!


